Hello friends. We hope you are doing fine. Today, we will design a project where we control a Door Lock with an ESP32 Microcontroller board. We will use an IR obstacle sensor for the project's sensing part. The door lock will open or remain closed depending upon the sensor’s output. We will see the condition of the door lock on a web server.
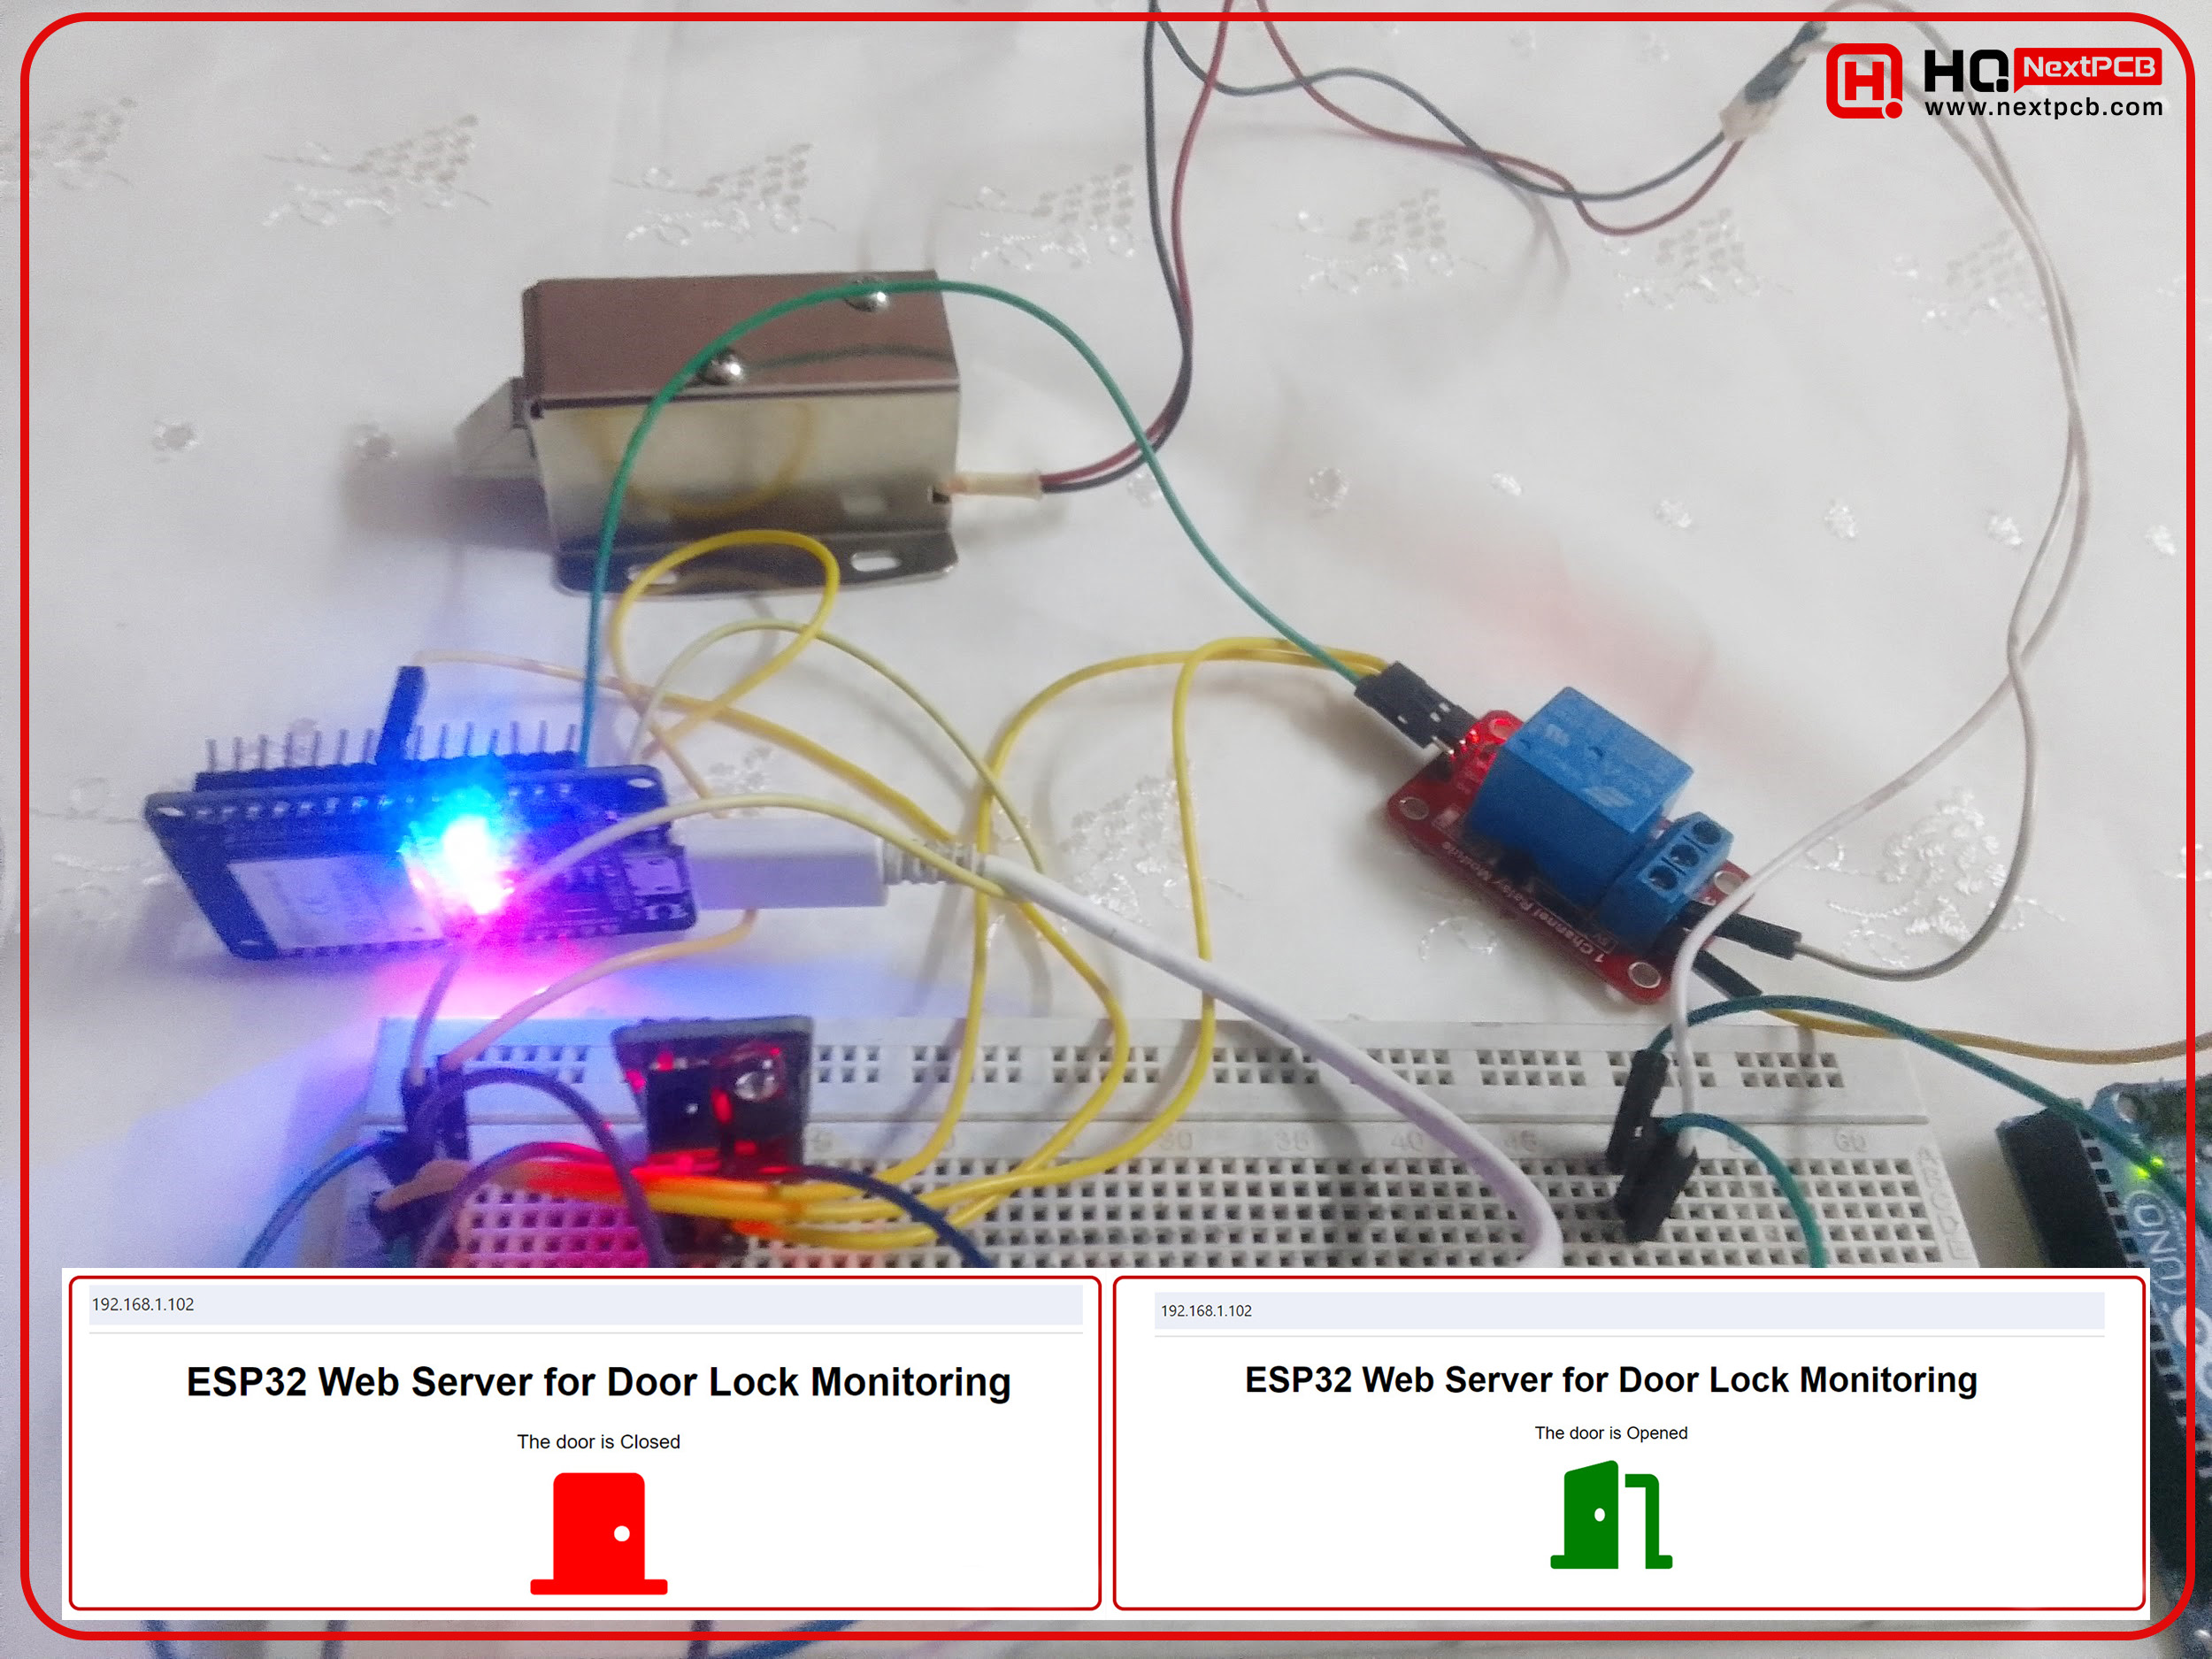
Fig: Circuit for ESP32-controlled IR obstacle sensor-based door lock
What will we learn from this project?
From this project, we will learn-
- How to drive a 12V DC solenoid door lock with ESP32.
- How to drive a relay with the ESP32.
- How to read the output of an IR obstacle sensor with the ESP32.
- How to create a web server in the ESP32.
- How to create colorful icons on the web server.
- How to send string data from the ESP32 to the web server.
Projects like the ESP32-based web server for door lock monitoring and control can be utilized in various domains, showcasing the integration of IoT (Internet of Things) with everyday applications. Here are several areas where such projects can be applied:
Home Automation
Home Automation is one of the primary fields where such projects find significant application. An ESP32-based door lock system can enhance home security by allowing homeowners to monitor and control their door locks remotely. This project can be integrated with other smart home devices like lights, cameras, and alarm systems to create a comprehensive security network. Users can check the status of their doors from anywhere in the world and lock or unlock them using a web interface or a smartphone app.
Office Security Systems
In office environments, ensuring the security of sensitive areas is crucial. An IoT-enabled door lock system can restrict access to certain rooms or areas to authorized personnel only. By integrating an ESP32-based door lock system, businesses can monitor entry points in real time and maintain logs of entry and exit times, enhancing both security and accountability. Such systems can also be programmed to allow access only during certain hours, thus adding another layer of security.
Rental Property Management
For property managers handling multiple rental units, an automated door lock system can be incredibly useful. Instead of providing physical keys, which can be lost or duplicated without permission, landlords can issue temporary access codes or control access via a web interface. This system can be particularly advantageous for managing short-term rentals or vacation homes, providing a seamless check-in and check-out experience for guests.
Healthcare Facilities
In healthcare facilities, certain areas such as pharmacies, storage rooms for medical supplies, and patient records rooms require restricted access. An ESP32-based door lock system can ensure that only authorized medical personnel can enter these sensitive areas. Additionally, the ability to monitor and control these locks remotely allows for quick responses in emergencies or in case of security breaches.
Educational Institutions
Schools and universities can benefit from smart door lock systems by controlling access to classrooms, labs, and administrative offices. By employing such technology, institutions can prevent unauthorized access and enhance the safety of students and staff. Moreover, integrating such systems with student and staff ID cards or mobile apps can streamline the access process and provide detailed logs for security audits.
Industrial and Warehouse Security
Implementing an IoT-enabled door lock system can protect these assets by ensuring that only authorized personnel have access to storage areas. These systems can also be integrated with other security measures like cameras and alarms to provide a robust security infrastructure.
Data Centers
Data centers require stringent security measures to protect sensitive data. An ESP32-based door lock system can be part of a multi-layered security approach, ensuring that only authorized personnel can access server rooms. Real-time monitoring and logging capabilities can help in maintaining high-security standards and complying with regulatory requirements.
Remote Locations
For remote sites such as construction sites, agricultural facilities, or utility stations, having an IoT-enabled door lock system can significantly improve security and management. Managers can remotely monitor and control access to these sites, reducing the need for constant on-site supervision and allowing for quick response to any security alerts.
Vehicle Security
In vehicle security, such projects can be applied to create smart locks for cars, trucks, or delivery vans. Owners can monitor the status of their vehicle locks remotely and receive alerts if any unauthorized access is attempted.
Components Required
We will use the following components in this project.
|
Components |
Quantity |
|
ESP32-WROOM |
1 |
|
Micro USB data cable |
1 |
|
IR obstacle sensor |
1 |
|
1-channel 5V relay module |
1 |
|
Breadboard |
1 |
|
Male-to-male jumpers |
7 |
|
Male-to-female jumpers |
5 |
|
Female-to-female jumpers |
1 |
|
12V DC adapter |
1 |
|
DC jack with connector(we used a wasted Arduino instead) |
1 |
|
12V solenoid door lock |
1 |
Circuit diagram
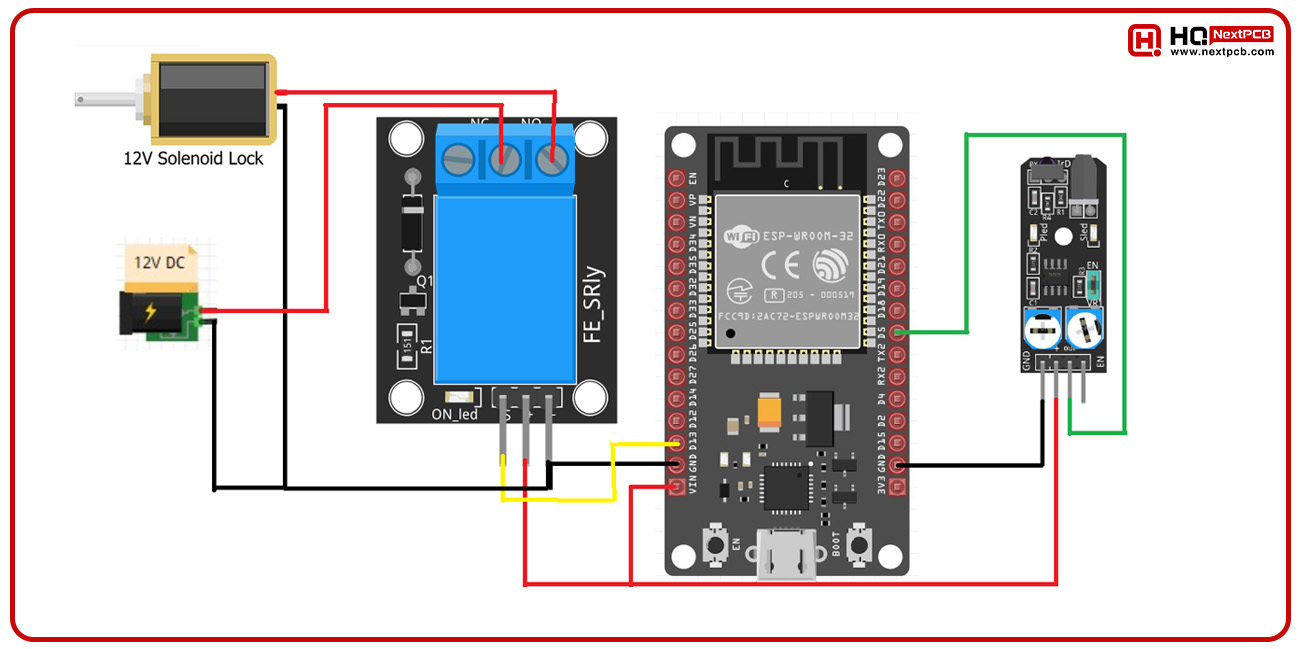
Fig: Circuit diagram
Connection charts
Connections between the ESP32 and the IR obstacle sensor:
|
ESP32-WROOM |
IR obstacle sensor |
|
Vin |
+ |
|
GND |
GND |
|
D5 |
OUT |
Connections between the ESP32 and the relay module:
|
ESP32-WROOM |
1-channel relay module |
|
Vin |
VCC |
|
GND |
GND |
|
D5 |
OUT |
|
12V power supply |
Relay module |
ESP32-WROOM |
Doorlock |
|
+ |
NO |
|
|
|
- |
GND |
GND |
GND |
|
|
COM |
|
+ |
ESP32 Installation in Arduino IDE
Is this your first project with the ESP32? If yes, you need to perform the board installation process.
- Go to File>Preferences.
- Copy this link https://dl.espressif.com/dl/package_esp32_index.json
- Paste the link to the Additional boards manager URLs and click OK.
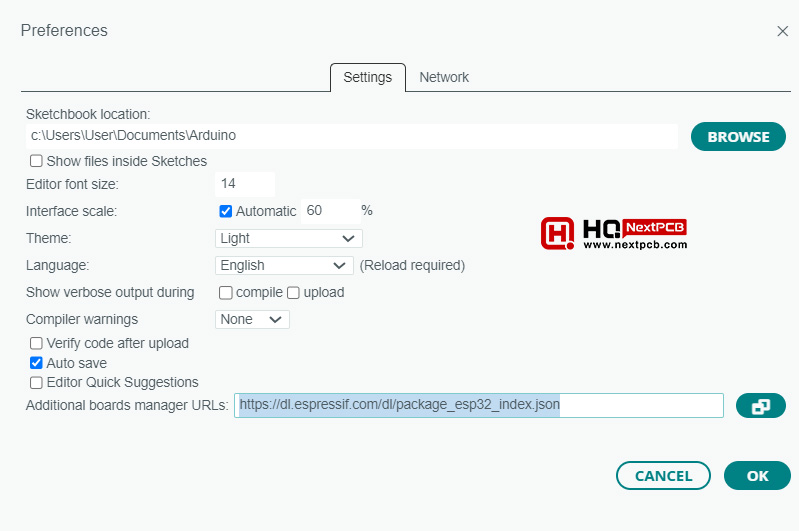
Fig: Additional boards manager
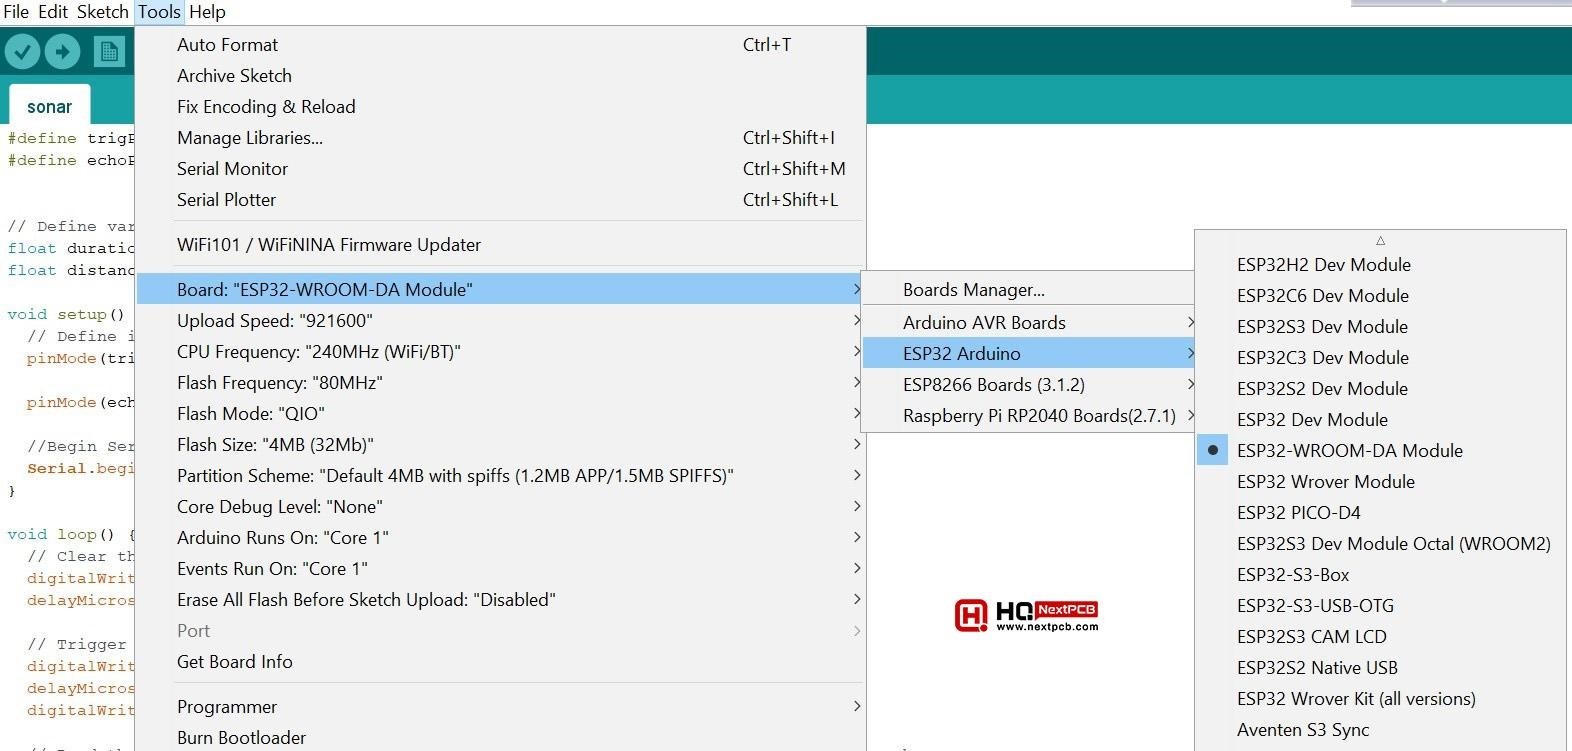
- Go to Tools>Board>Boards Manager.
- Type esp32 here.
- Select ESP32 and click Install.
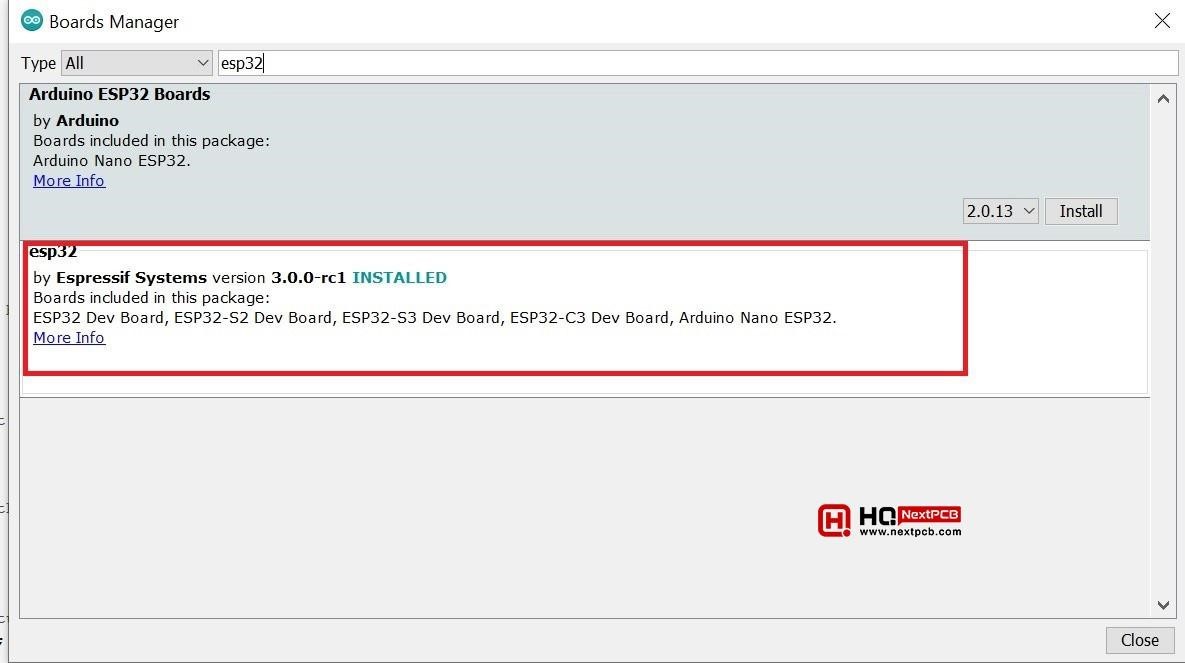
- After installation, you can go to Tools>Board. You will see the list of ESP32 boards as shown in the following picture.
Programming Code
#include
// Replace with your network credentials
const char* ssid = "Hamad";
const char* password = "barsha123";
WiFiServer server(80);
// Variable to store the HTTP request
String header;
int relayPin = 13; // choose the pin for the relay
int inputPin = 5; // choose the input pin (for IR obstacle sensor)
int val = 0;
String string_variable = ""; // string variable to store the doorlock status
String icon_variable = ""; // string variable to store the icon HTML
// Current time
unsigned long currentTime = millis();
// Previous time
unsigned long previousTime = 0;
const long timeoutTime = 2000;
void setup() {
pinMode(relayPin, OUTPUT);
pinMode(inputPin, INPUT);
Serial.begin(9600);
// Connect to a Wi-Fi network with your own SSID and password
Serial.print("Connecting to ");
Serial.println(ssid);
WiFi.begin(ssid, password);
while (WiFi.status() != WL_CONNECTED) {
delay(500);
Serial.print(".");
}
// Print the device's IP address and start web server
Serial.println("");
Serial.println("WiFi connected.");
Serial.println("IP address: ");
Serial.println(WiFi.localIP());
server.begin();
}
void loop() {
val = digitalRead(inputPin);
if (val == LOW) { // check if the IR obstacle sensor value is LOW
digitalWrite(relayPin, HIGH); // turn relay ON
string_variable = "The door is Opened";
icon_variable = "";
} else {
digitalWrite(relayPin, LOW); // turn relay OFF
string_variable = "The door is Closed";
icon_variable = "";
}
delay(200);
WiFiClient client = server.available(); // Listen for all incoming clients
if (client) { // If there is a new client connected
currentTime = millis();
previousTime = currentTime;
Serial.println("New Client.");
String currentLine = ""; // make an empty String that will hold incoming data from the client
while (client.connected() && currentTime - previousTime <= timeoutTime) { // loop while the client's connected
currentTime = millis();
if (client.available()) { // if there's bytes to read from the client,
char c = client.read(); // read a byte, then
Serial.write(c); // print it out the serial monitor
header += c;
if (c == '\n') { // if the byte is a newline character
//If the current line is blank, you have two newline characters in a row.
//That's the end of the client HTTP request, so send a response:
if (currentLine.length() == 0) {
// HTTP headers always start with a response code (e.g. HTTP/1.1 200 OK)
// and a content-type so the client knows what's coming, then a blank line:
client.println("HTTP/1.1 200 OK");
client.println("Content-type:text/html");
client.println("Connection: close");
client.println();
// turns the GPIOs on and off
// Display the HTML web page
client.println("
"
);
client.println("
"
);
client.println("
");
// Adding Font Awesome CDN link
client.println("
");
client.println("");
client.println(" ");
// Web Page Heading
client.println("
ESP32 Web Server for Door Lock Monitoring
");
client.println("
" + string_variable + "
");
client.println(icon_variable);
client.println("");
// The HTTP response ends with another blank line
client.println();
// Break out of the while loop
break;
} else { // if you got a newline, then clear currentLine
currentLine = "";
}
} else if (c != '\r') { // if you got anything else but a carriage return character,
currentLine += c; // add it to the end of the currentLine
}
}
}
// Clear the header variable
header = "";
// Close the connection
client.stop();
Serial.println("Client disconnected.");
Serial.println("");
}
}
Code Explanation
Includes the WiFi library, necessary for connecting the ESP32 to a WiFi network.
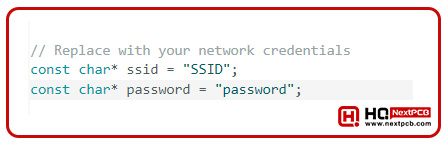
Defines the WiFi SSID and password for your network.
Creates a WiFi server on port 80.
Declares a string to store the HTTP request header.

Defines the GPIO pins for the relay and the IR obstacle sensor.

Declares variables for reading the sensor status and storing the door status message and icon HTML.
Defines timing variables for handling client connections and setting a timeout duration.
Setup() Function
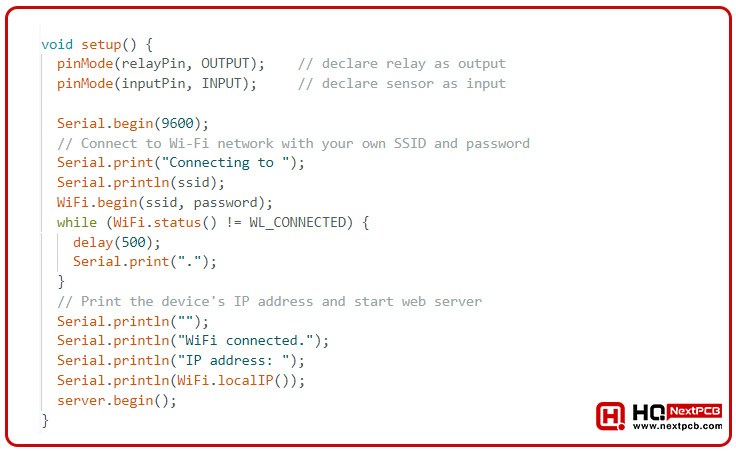
In the `setup` function:
- Sets the relay pin as an output and the sensor pin as an input.
- Initializes serial communication at 9600 baud.
- Connects to the WiFi network using the provided SSID and password.
- Prints the connection status and IP address to the serial monitor.
- Starts the web server.
Loop() Function
In the `loop` function:
- Reads the value from the IR obstacle sensor pin.
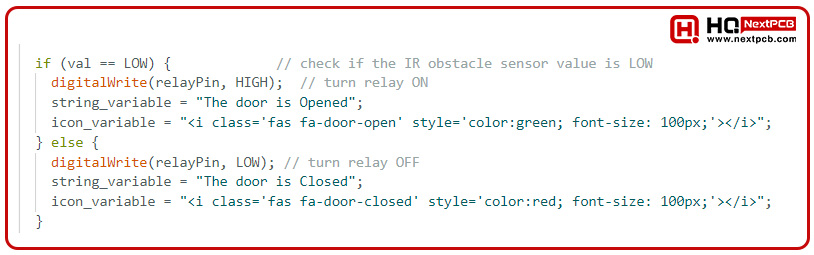
Check the sensor value:
- If the sensor is triggered (LOW), it turns the relay ON, sets the door status message to "The door is Opened," and sets the icon to a green door-open icon.
- If the sensor is not triggered (HIGH), it turns the relay OFF, sets the door status message to "The door is Closed," and sets the icon to a red door-closed icon.

Adds a short delay to debounce the sensor reading.

Listens for incoming client connections.

If a new client connects:
- Updates the current time.
- Prints a message to indicate a new client connection.
- Initializes an empty string to store incoming client data.
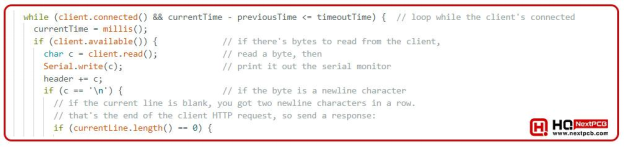
While the client is connected and the timeout has not been reached:
- Updates the current time.
- Reads incoming data from the client.
- Prints the incoming data to the serial monitor.
- Appends the data to the request header.
- If a newline character is received:
- If the current line is blank, it means the end of the HTTP request.

Sends the HTTP response headers indicating a successful response and that the content type is HTML.
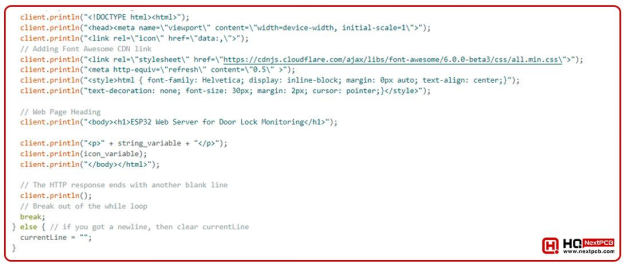
Constructs and sends the HTML response:
- Starts the HTML document.
- Adds the meta tag.
- Adds the link to the Font Awesome CSS for icons.
- Sets the page to refresh every 0.5 seconds.
- Defines the CSS styles for the page.
- Adds the page heading.
- Displays the door status message.
- Displays the corresponding door status icon.
- Ends the HTML document.
- Sends the HTTP response.
- Breaks out of the while loop if the request is complete.
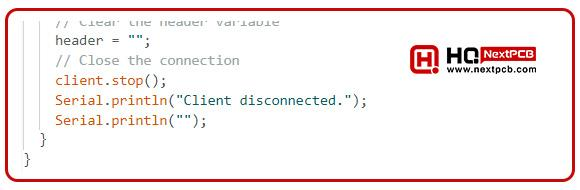
After handling the client's request:
- Clears the request header variable.
- Closes the client connection.
- Prints a message indicating the client has disconnected.
This code effectively creates a simple web server on the ESP32 that monitors an IR sensor to determine the state of a door (open or closed) and controls a relay accordingly. It also provides a web interface to display the door's status.
Testing/Results
Make all necessary connections. Upload the code. Open the web server.
When no one is in front of the obstacle sensor, the door lock will remain off.
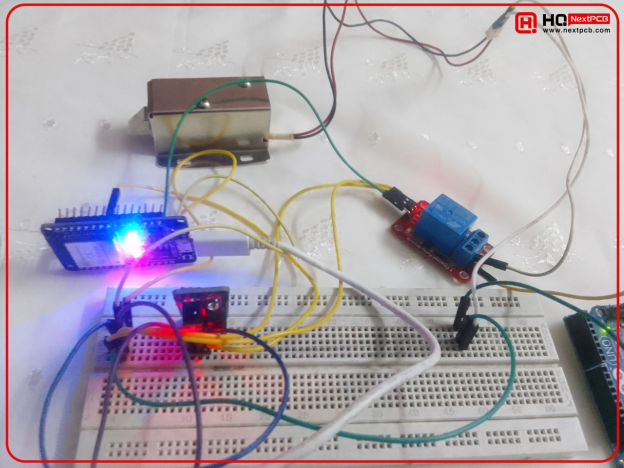
fig: The door lock is closed
The web server will look like this.
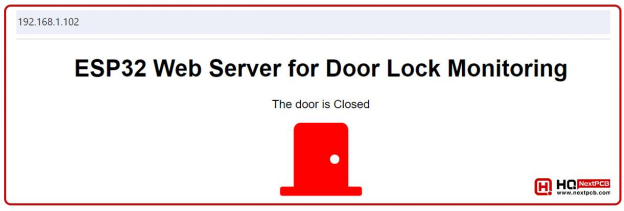
fig: Web server when the door is closed
When there is someone in front of the obstacle sensor, the door lock will open.
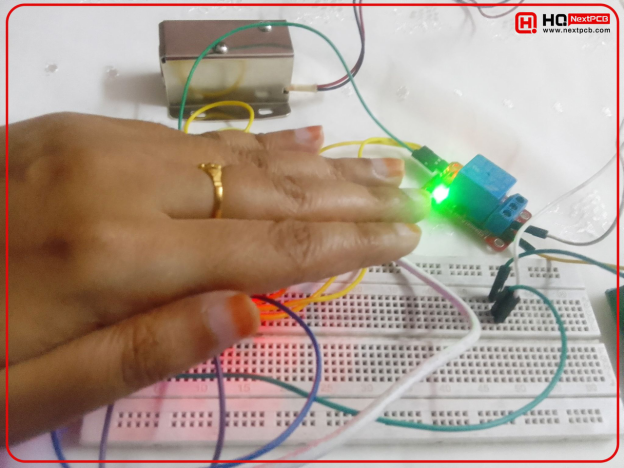
fig: The door lock is opened
The web server will look like this.
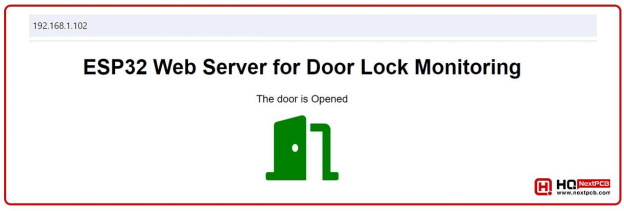
fig: Web server when the door is opened
Comment