It has become possible to realize many uses and applications by having the ability to measure temperature variations in our surrounding environment. Whether it is working in an environment that requires certain conditions for sensitive electronic equipment, maintaining the right temperature for food and medicine, or keeping track of the processes where temperature plays an important factor like heat-sensitive materials, setting an automated temperature control system that can give alerts if the conditions are not favorable are beneficial. This article will mention how to create such a system with inexpensive, yet very powerful, digital temperature sensors – DS18B20 and a resistive network permitting reading multiple sensors through a single data line.
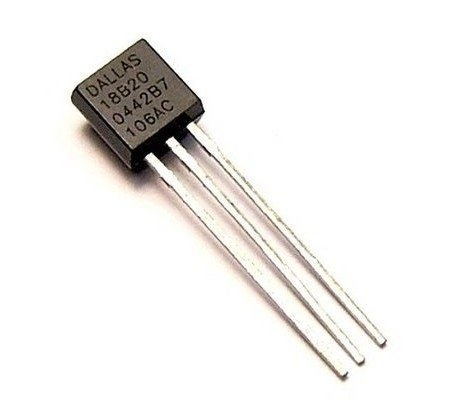
Why Choose the DS18B20 Sensor?
As for the sensors used to measure temperature, a few possibilities are most popular and have certain advantages that make them ideal for temperature control systems such as the DS18B20:
- Accuracy – The performance of the DS18B20 is quite impressive, the temperature readings provided by the device are accurate to a 0. range of -10 ± 85°C, an increase in temperature of 5 °C above the value. Such detail enables effective observation and regulation of temperature fluctuations to the finest detail.s.
- Multiple Sensors - The 1-Wire communication protocol used by the DS18B20 allows you to connect multiple sensors to the same data line, significantly reducing wiring complexity compared to single-sensor approaches. This is perfect for monitoring temperature in different areas using a single microcontroller.
- Reliability - DS18B20 sensors are resistant to moisture and vibration, and thus pose no risk of being damaged by these hazardous factors, unlike other fragile sensors. The casings are made of stainless steel, so they provide a high level of protection to what is inside.
- Low Cost - Individual DS18B20 sensors only cost a dollar or two each in small quantities and are very affordable compared to other precision temperature sensors. With their small size, you can place them almost anywhere you need temperature readings.
- Unique IDs - Each DS18B20 contains a unique, unchangeable 64-bit ID number, allowing you to distinguish readings from different sensors without complex wiring.
- Wide Temperature Range - From -55°C to +125°C, DS18B20 sensors can monitor freezing and high heat applications other sensors can't handle.
- Parasite Power - The 1-Wire protocol only requires a single data signal from your microcontroller to read temperatures. No external power is needed at the sensor itself, saving wiring complexity.
So in summary, the DS18B20 combination of precision, flexibility, reliability, and low cost makes it an excellent choice as the foundation of our temperature monitoring system project. Let's start designing how we will interface multiple sensors.
Compared to Other Popular Temperature and Environmental Sensors
Now that we understand that the DS18B20 digital temperature sensor is effective for the fundamental role of temperature measurement in the system, it is also good to take a look at some additional sensor chips, which are utilized in IoT and environmental sensing. Three other well-performed modules that are available include BMP280, Si7021, and LM75. In the following table, let’s go through the main specifications and differences of each item in question to determine the comparative pros and cons.
BMP280 Sensor
The BMP280 from Bosch is an ENV (environmental) sensor, as in addition to temperature it also measures atmospheric pressure. This makes it a more full-featured sensing solution out of the box than options like the DS18B20 that only report temperature.
The BMP280 communicates over I2C/SPI interfaces that most microcontrollers support, simplifying wiring compared to the 1-Wire protocol. It provides temperature readings to an accuracy of ±1°C over a range of -40 to +85°C. Pressure measurements are equally precise between 300 to 1100 hectopascals.
Being a relatively new sensor, the BMP280 benefits from smaller die size and packaging improvements versus older chips. This allows for placing multiple units in more compact spaces. It also runs on very low power, suitable for extended battery life in portable applications.
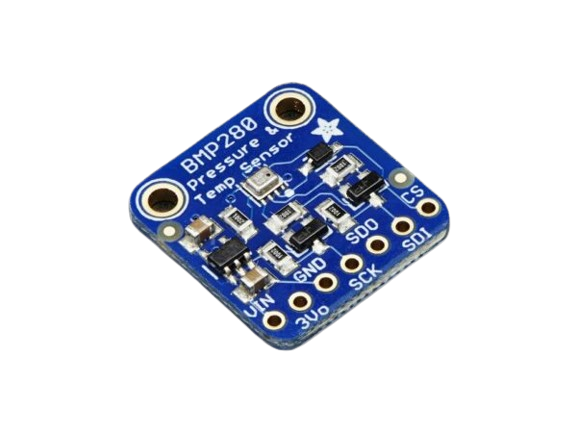
While offering an ambient pressure channel in addition to temp, the BMP280 does require 2-3 pins for I2C versus just 1 for 1-wire. It also costs a bit more at around $2-3 each in small quantities compared to $1-2 for DS18B20s.
Si7021 Sensor
Another perfect example of a digital humidity and temperature sensor is Si7021 manufactured by Silicon Labs and commonly used in various IoT applications. Similar to the BMP280, it is a single-chip solution where we have two environmental parameters.
The Si7021 reports temperature from -40 to +123.8°C with an accuracy of ±0.5°C. Its humidity sensing spans o-100%RH with 2-3% accuracy. Communication is again over I2C for direct microcontroller interfacing.
As a newer design, the Si7021 benefits from lower power consumption than earlier temp/humidity sensors. It also features improved resistance to materials like sulfur compounds and organic vapors that can degrade sensor performance over time in some environments.
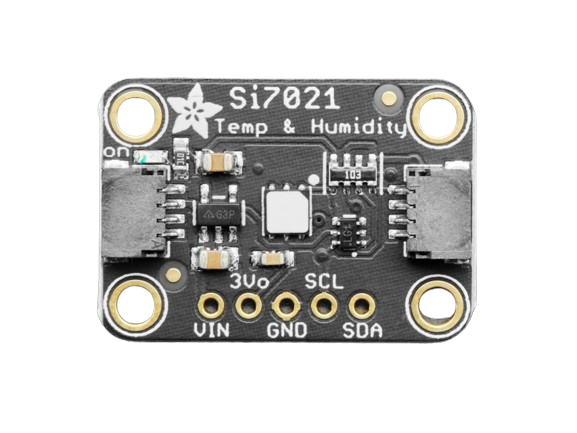
However, where the DS18B20 and even BMP280 still excel is cost - the Si7021 typically sells for $3-5 each in small orders due to its added on-chip humidity sensing capabilities versus plain temperature alone.
LM75 Temperature Sensor
The LM75 from Texas Instruments was among the earliest digital temperature sensors released and still finds use today due to its wide industrial temperature range. It communicates via I2C and measures from -55 to +125°C with an accuracy of ±3°C.
While not as precise as the ±0.5°C ratings of newer chips, the LM75 remains attractive for high/low temp applications other sensors can't reach. It also requires minimal external components and is very affordable at $1-2 each.
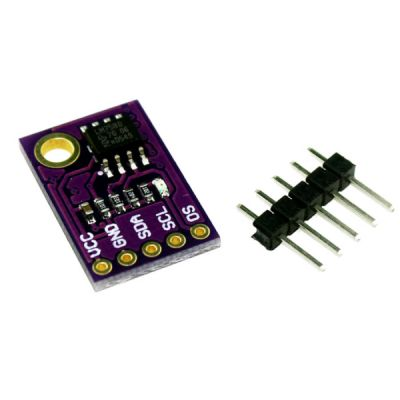
However, the older LM75 does consume more power than low-power designs like the DS18B20, BMP280, or Si7021. Its larger package size also makes it harder to place multiple units closely together versus shrinking sensor footprints.
Using a Resistor Network for Bus Communication
While the 1-Wire protocol allows the connection of multiple DS18B20 sensors to a single data line, directly connecting all sensor lines in parallel could lead to electrical interference issues as sensor counts increase. This is where a resistor network comes in handy.
A resistor network is simply a collection of resistors arranged in such a way that each branch connects to a single sensor, while all branches share common buses for power and data. Placing a resistor, typically around 1kΩ, in each branch, limits the current any one sensor can draw and isolates their signals electrically.
To build the resistor network section of our circuit, we will need:
- A Vdd voltage supply bus, typically 5V, to power all sensors through the resistors
- A DQ data line bus to connect to our microcontroller's 1-Wire pin
- Individual connection points for the desired number of temperature sensors
- Resistors, around 1kΩ each, between the buses and each sensor connection
On a breadboard or prototype PCB, this is simply a matter of running parallel power and data buses, then placing a resistor and connecting point for each sensor in between. The value of the resistors isn't too critical, but 1kΩ is generally suitable as a balance between current limiting and noise isolation.
With the resistor network in place, we can now connect our DS18B20 temperature sensors one per connection point. Their power and data lines will be isolated through the resistors, preventing interference while still allowing communication over the shared 1-Wire buses.
This versatile design lets us easily expand the system by adding more sensor branches as needed. By using a resistor per sensor rather than a direct connection, reliability is increased.
Now that we have our sensor interface sorted, let's discuss integrating it with a microcontroller.
Reading Temperatures from the 1-Wire Bus
While the Arduino integrates all of the needed components in one board, we need a separate microcontroller to read out the temperature data from the DS18B20 array since the microcontroller needs to be able to handle a 1-Wire interface as provided by the Adafruit DS18x20 library. Luckily, most of the commonly used microcontroller interfaces such as Arduino, Raspberry Pi, ESP32, etc., support the 1-Wire protocol with minimal extra hardware addition.
Our microcontroller will connect to the resistor network's shared DQ data line. It can then initiate temperature reads by pulsing this line low and high at specific timings defined by the 1-Wire ROM protocol. Embedded in the DS18B20 is circuitry to respond correctly over the single data pin without issues caused by having multiple sensors connected.
To extract the actual temperature readings, the microcontroller will need a 1-Wire library code. This handles all the low-level communication details and timing to initiate sensor reads. It allows high-level calls to accomplish things like:
- Scan the 1-Wire bus to detect how many sensors are present by their unique 64-bit IDs
- Select an individual sensor by ID to make it the target for commands
- Request the target sensor return its temperature reading
- Convert the returned data into an actual temperature value in Celsius or Fahrenheit
With libraries available for essentially every mainstream microcontroller platform, adding 1-Wire support is very straightforward. We simply need to follow the basic sequence:
- Initialize 1-Wire pin and get library setup
- Scan bus and save IDs of detected sensors
- Select sensor by ID, request temp read
- Convert returned data to a temperature value
- Repeat for all sensors in repeated intervals
The sensing can then be done periodically, like once a minute, to monitor temperatures over time. Storing readings in memory or transmitting them to another system allows long-term trend analysis.
Now that we know how to interface sensors and request temperature readings, we should consider monitoring and alert options for the system.
Implementing Monitoring and Alert Capabilities
So far we have the base hardware and software to read temperatures from multiple points. But to make this a truly useful monitoring system, we need ways to track readings over time, set thresholds, and trigger alerts if conditions change undesirably.
One simple option is to store temperature readings and timestamps in the microcontroller's memory or an attached data storage device like an SD card. Periodically polling all sensors and logging every reading over hours or days allows viewing historical temperature charts on a computer later.
This provides insight into highs, lows, and any other patterns or anomalies after the fact. But for critical systems, we also typically want real-time alerts if an issue arises.
To enable active monitoring and alerts, the system should compare each new temperature reading against configurable threshold limits. If any sensor exceeds the maximum allowed temperature or falls below the minimum, that could trigger some kind of notification.
Possible alert actions include:
- Triggering on-board LEDs, buzzers, or other output devices to provide a visual/auditory local alarm
- Sending push or SMS notifications to connected phones through cellular modems
- Sending email alerts to monitoring personnel
- Making a POST request to cloud data services or web interfaces
- Activating external alerts like sirens or automated corrective actions
Getting more advanced, temperature differentials could also raise warnings. For example, if one sensor suddenly reads 5°C higher than the others, it may indicate a localized hot spot problem rather than an overall trend.
Additionally, the rate of change thresholds prevents false alarms from brief fluctuations. Only after the temperature has been continuously rising/falling for a set duration would alerts trigger.
Implementing monitoring features like these makes the system a comprehensive temperature control solution rather than just passive logging. Personnel are actively notified of any out-of-bounds conditions needing attention.
Testing and Expanding the Deployed System
After building, coding, and testing our temperature monitoring circuits and software, it will be time to deploy the system to start gathering useful data and operate as intended. Here are some tips:
- Stage initial testing in a climate-controlled test area like a chamber or insulated box, where you can precisely regulate temperatures for validation and calibration of readings.
- Verify sensors respond as expected to artificial temperature changes at both ends of their measuring range. Check calibration remains accurate over time with repeated tests and exposure to environmental factors like moisture or vibration expected post-deployment.
- Gradually move deployment to target real-world locations while still closely monitoring system operation through a debug or configuration interface. Troubleshoot issues that may arise from field conditions not present during lab testing.
- Over time as the system successfully operates, expands to cover additional monitoring points of interest by adding more sensor modules through resistor network branches.
- Maintain the system with occasional re-calibration checks against known-precision reference instruments to confirm readings remain within tolerance as sensors age. Replace any that drift outside acceptable limits.
- Upgrade the deployed system over time as technology advances provide more features. For example, migrating to wireless sensors eliminates wiring effort for hard-to-reach locations. Switching the microcontroller to a more powerful model enables added processing of sensor data.
- Document all deployment details, locations monitored, standard operating parameters, and alert policies for reference by monitoring personnel and technicians who may interact with the system over its lifespan. Proper documentation ensures optimal long-term usability.
With a phased testing and deployment approach, the system can reliably monitor temperature conditions at scale for safety, quality, or process control purposes for many years to come. Preventative maintenance and evolutionary upgrades keep it serving operational needs as requirements change over time.
Potential Expansions and Applications
While our core focus has been on using DS18B20 sensors and a resistor network interface to precisely monitor temperature, there are many ways this system could potentially expand:
- Additional environmental parameters - Integrate sensors for humidity, light, pressure, vibration, or other variables by adding analog/digital inputs to the monitoring platform. Correlate changes.
- Wireless interfaces - Add WiFi, Bluetooth, or cellular modules to remotely access readings without running new wiring to sensors placed anywhere nearby.
- Cloud connectivity - Integrate the monitoring system with cloud services, dashboards, and apps to access sensor data remotely over the internet from any location via browser or mobile.
- SCADA/PLC integration - Interface temperature data directly into larger industrial control and automation systems for direct machine or factory-level environmental monitoring use cases.
- Sensor packaging - Enclose individual sensor boards and attendant electronics/batteries in rugged, sealed enclosures to allow long-term placement anywhere indoors or outdoors without additional equipment vulnerability concerns.
- Sensors on equipment - Embed sensors inside machines, materials, or products themselves to gain temperature telemetry from within operational equipment, materials, or packaged goods without external contact probes.
Some specific application areas this monitoring system design could apply include:
- Cold chain logistics - Ensuring perishable goods remain within safe temperature ranges during storage and transport in facilities, trucks, and cargo ships.
- Industrial process control - Regulating heat levels in manufacturing equipment, tanks, reactors, and other process vessels to specified operational parameters.
- Building/home automation - Automatically monitoring and regulating HVAC systems to provide consistent comfortable temperatures throughout structures.
- Medical and laboratory use - Maintaining safe operating or storage conditions for temperature-sensitive medications, samples, or laboratory reagents.
- Food preparation and holding - Verifying fridge/freezer temperatures for food safety and cooking or proofing chamber heat level control.
With its flexibility, precision, and low cost, variations on this DS18B20 and resistor network-based design could facilitate numerous temperature sensing applications where robust, multi-point monitoring solutions are required.
In summary, this article has outlined the development of an affordable yet powerful temperature monitoring system leveraging inexpensive but high-performance DS18B20 digital sensors. By employing a resistor network interface, the design allows scaling to monitor countless points using a single microcontroller. Implemented monitoring, alerts, and data recording functionality to create an autonomous smart sensing solution for numerous industrial and commercial needs. With its expandability and modular design approach, this provides a versatile foundation for customizing sensing applications almost without limit. As technology advances, upgrades can keep the system on the cutting edge well into the future.
Conclusion
In summary, each sensor discussed has advantages and tradeoffs to consider for different applications:
DS18B20 - Lowest cost, wide single temp range, parasite 1-Wire power, best for scaling multi-point arrays
BMP280 - Dual temp/pressure, small size, I2C interface, newest design of group
Si7021 - Combines temp and humidity sensing, I2C interface, newer design
LM75 - Broadest industrial temp range including cryogenic, simple to use but larger/older design
For the focused temperature monitoring system presented in the main article, the DS18B20 remains the best fit due to its low per-unit cost enabling larger sensor networks with precision readings.
However, where additional environment parameters or the benefits of I2C integration are needed, the BMP280, Si7021, or even LM75 could be better choices depending on the specific project requirements and tradeoffs between channels, accuracy, power, and pricing. With different sensor needs in various applications, there is no single best solution universally.
Comment