Introduction
Hello friends, I hope you all are doing great. Today we will discuss how to interface a PIR motion sensor with an ESP32 Microcontroller Board and publish the PIR sensor output in a web server.
Project Description
- First of all, we need to connect the PIR motion sensor with any digital pin of the ESP32.
- The ESP32 will read the sensor’s output.
- If there’s no motion around the PIR Sensor, it gives the LOW output but when it detects motion, the output gets HIGH.
- Using the Wifi connectivity of the ESP32, we will create a web server and print the motion detection results on that web server.
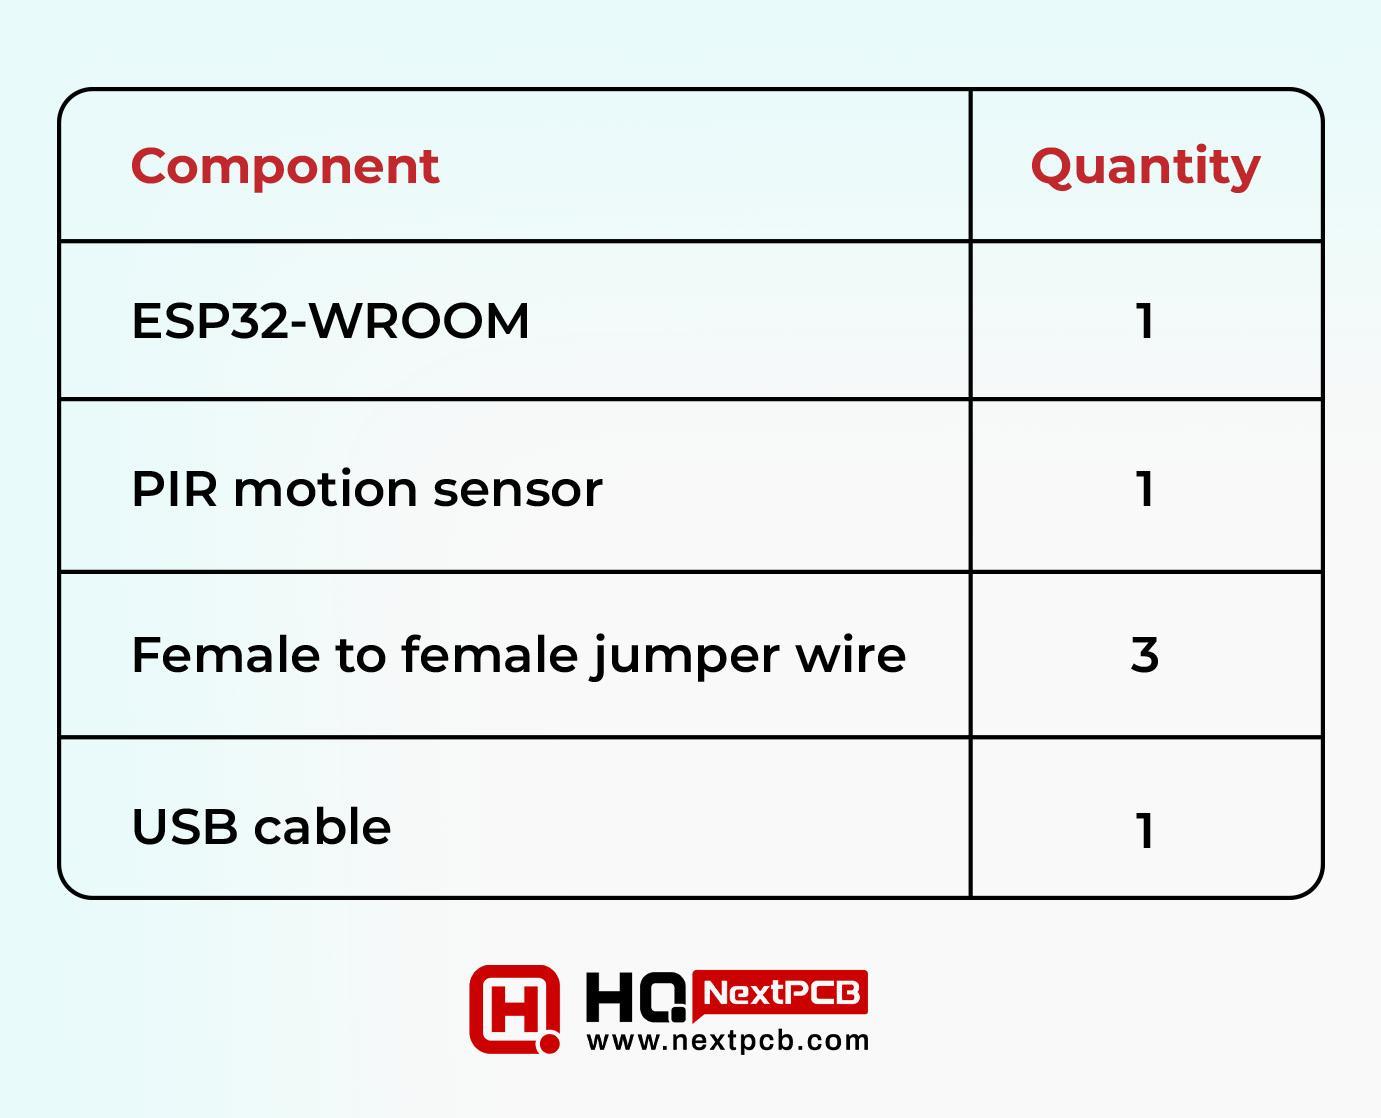
Components Required
In today’s project, we have used the below components:
|
|
|
|
|
|
|
|
|
|
|
|
|
|
|
Now, let’s first understand the working of these components one by one:
Introduction to ESP32
ESP32 is a standalone microcontroller board. It has an integrated wifi module and dual-mode Bluetooth module. The integration of these wireless communication protocols into a single chip makes the design process simple. It reduces the need for external modules. Thus, it ultimately lowers the overall cost of projects. It has touch sensors, ADCs, DACs, UART, SPI, I2C, and more. This rich feature set enables developers to create sophisticated and multifunctional IoT devices without the need for additional hardware. ESP32 has many different versions. We will use ESP32-WROOM-32 for our experiments.
Features of ESP32-WROOM-32
ESP32-WROOM-32 is a powerful, generic Wi-Fi + Bluetooth + Bluetooth LE MCU module. It is used in a wide variety of applications.
The collection of all these features ensures that a large number of tasks can be fulfilled. Using Wi-Fi allows a very long physical range. It can establish a direct connection to the Internet through a Wi-Fi router. Using Bluetooth, the user can comfortably connect to the phone or broadcast low-energy beacons for its detection.
Specifications of ESP32-WROOM-32 Bluetooth
The ESP32's Bluetooth capabilities are robust. Bluetooth Classic mode is ideal for applications that require high data rates. For example, audio streaming. Bluetooth Low Energy (BLE) is perfect for battery-powered devices that need long-term connectivity with minimal energy consumption. The flexibility to switch between these modes ensures that the ESP32 can be adapted to a wide variety of use cases, from low-latency data transmission to energy-efficient sensor networks.
ESP32 Bluetooth radio has Class-1, class-2, and class-3 transmitters.
Working Principle of PIR Sensor
PIR stands for passive infrared. PIR motion sensor is a contactless motion sensor. It can detect the motion of living beings in front of it. It detects the infrared waves emitted by humans and animals. Human eyes cannot see Infrared waves. However, these sensors can detect the change in infrared lengths caused by the movement of the living being.
Why is it called “passive”?
The sensor does not emit any energy. That’s why it’s called passive.
What’s inside a PIR motion sensor?
A typical PIR motion sensor looks like this.
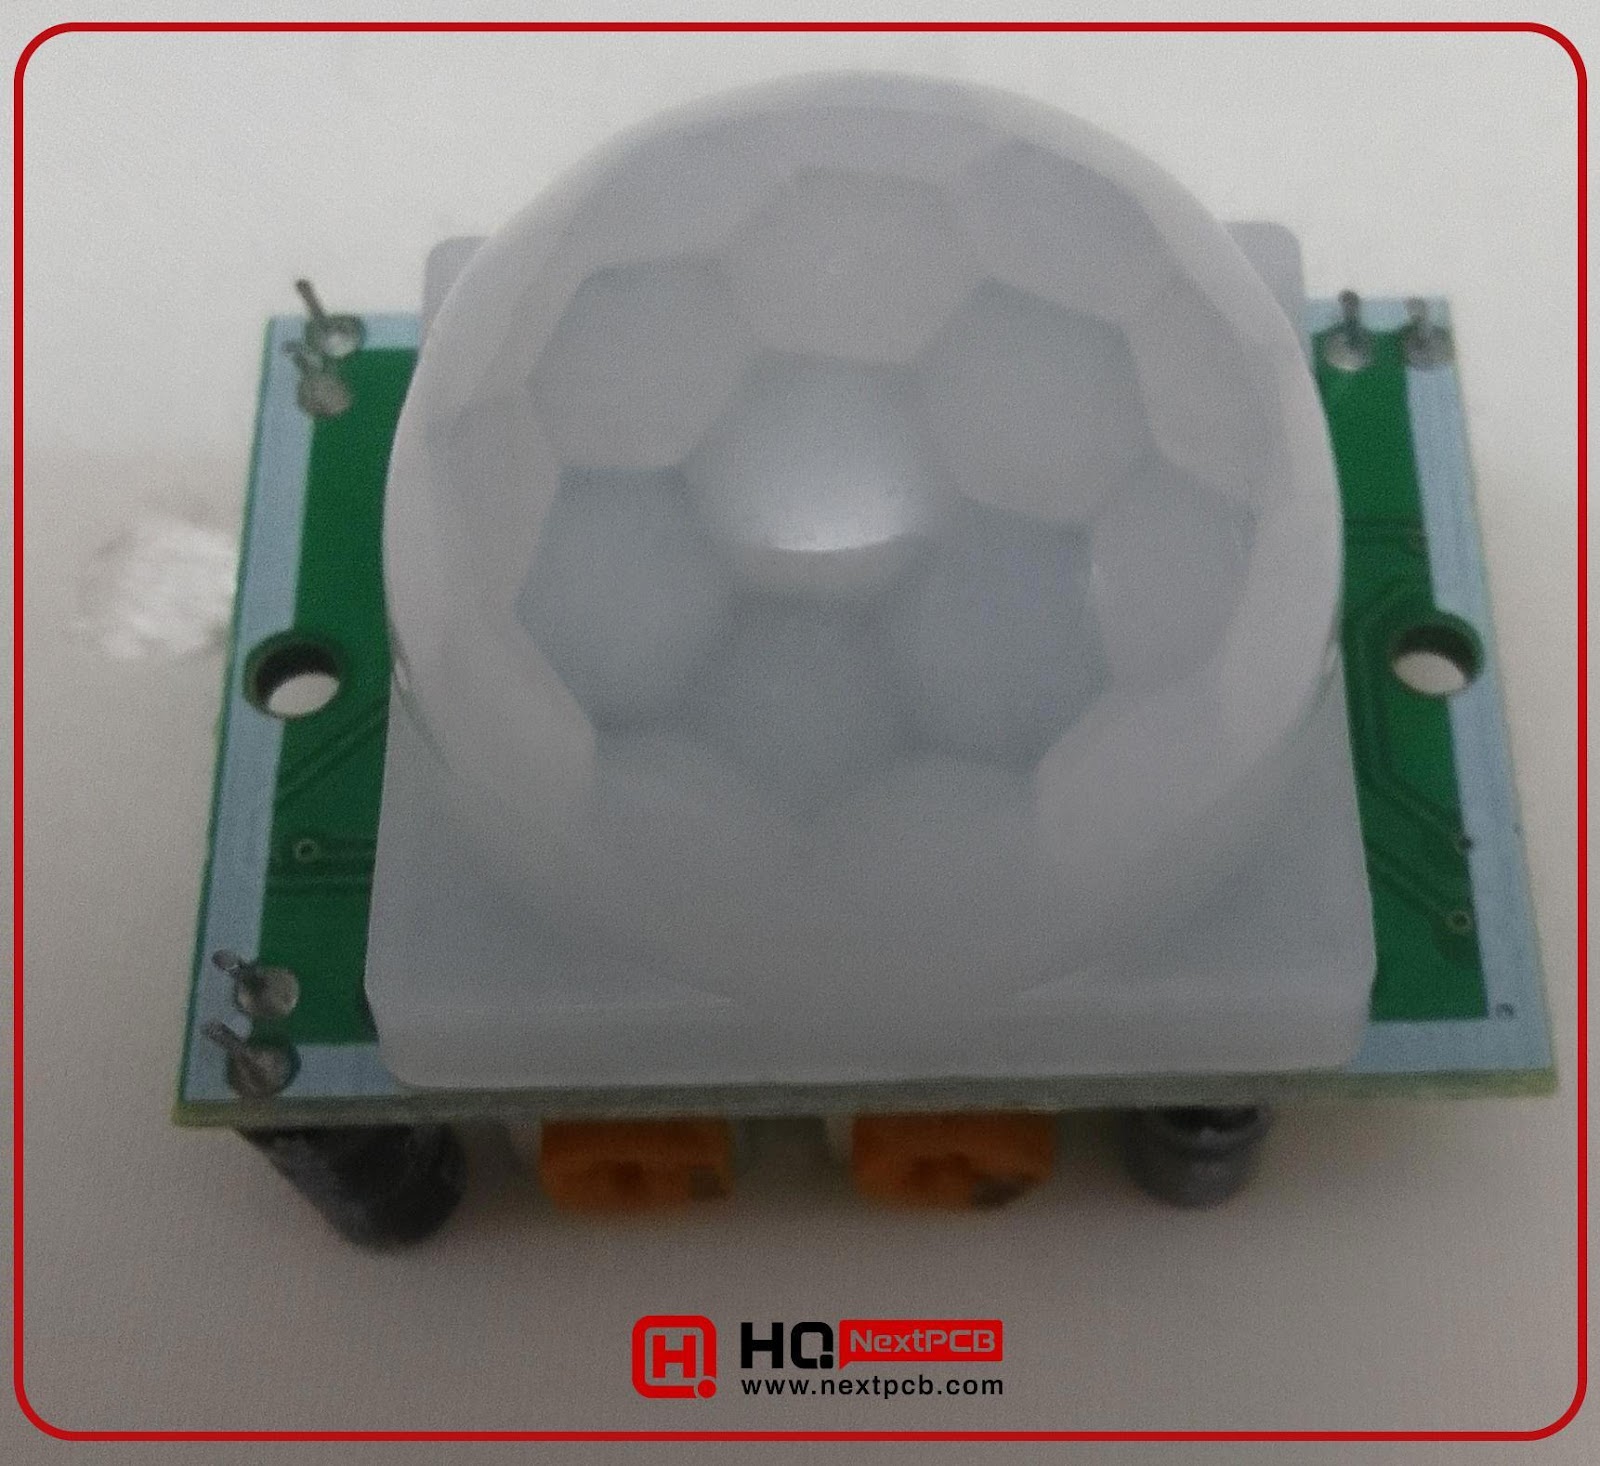
Fig: PIR motion sensor
The main sensor is covered by a fresnel lens. If you remove the lens, it looks like:
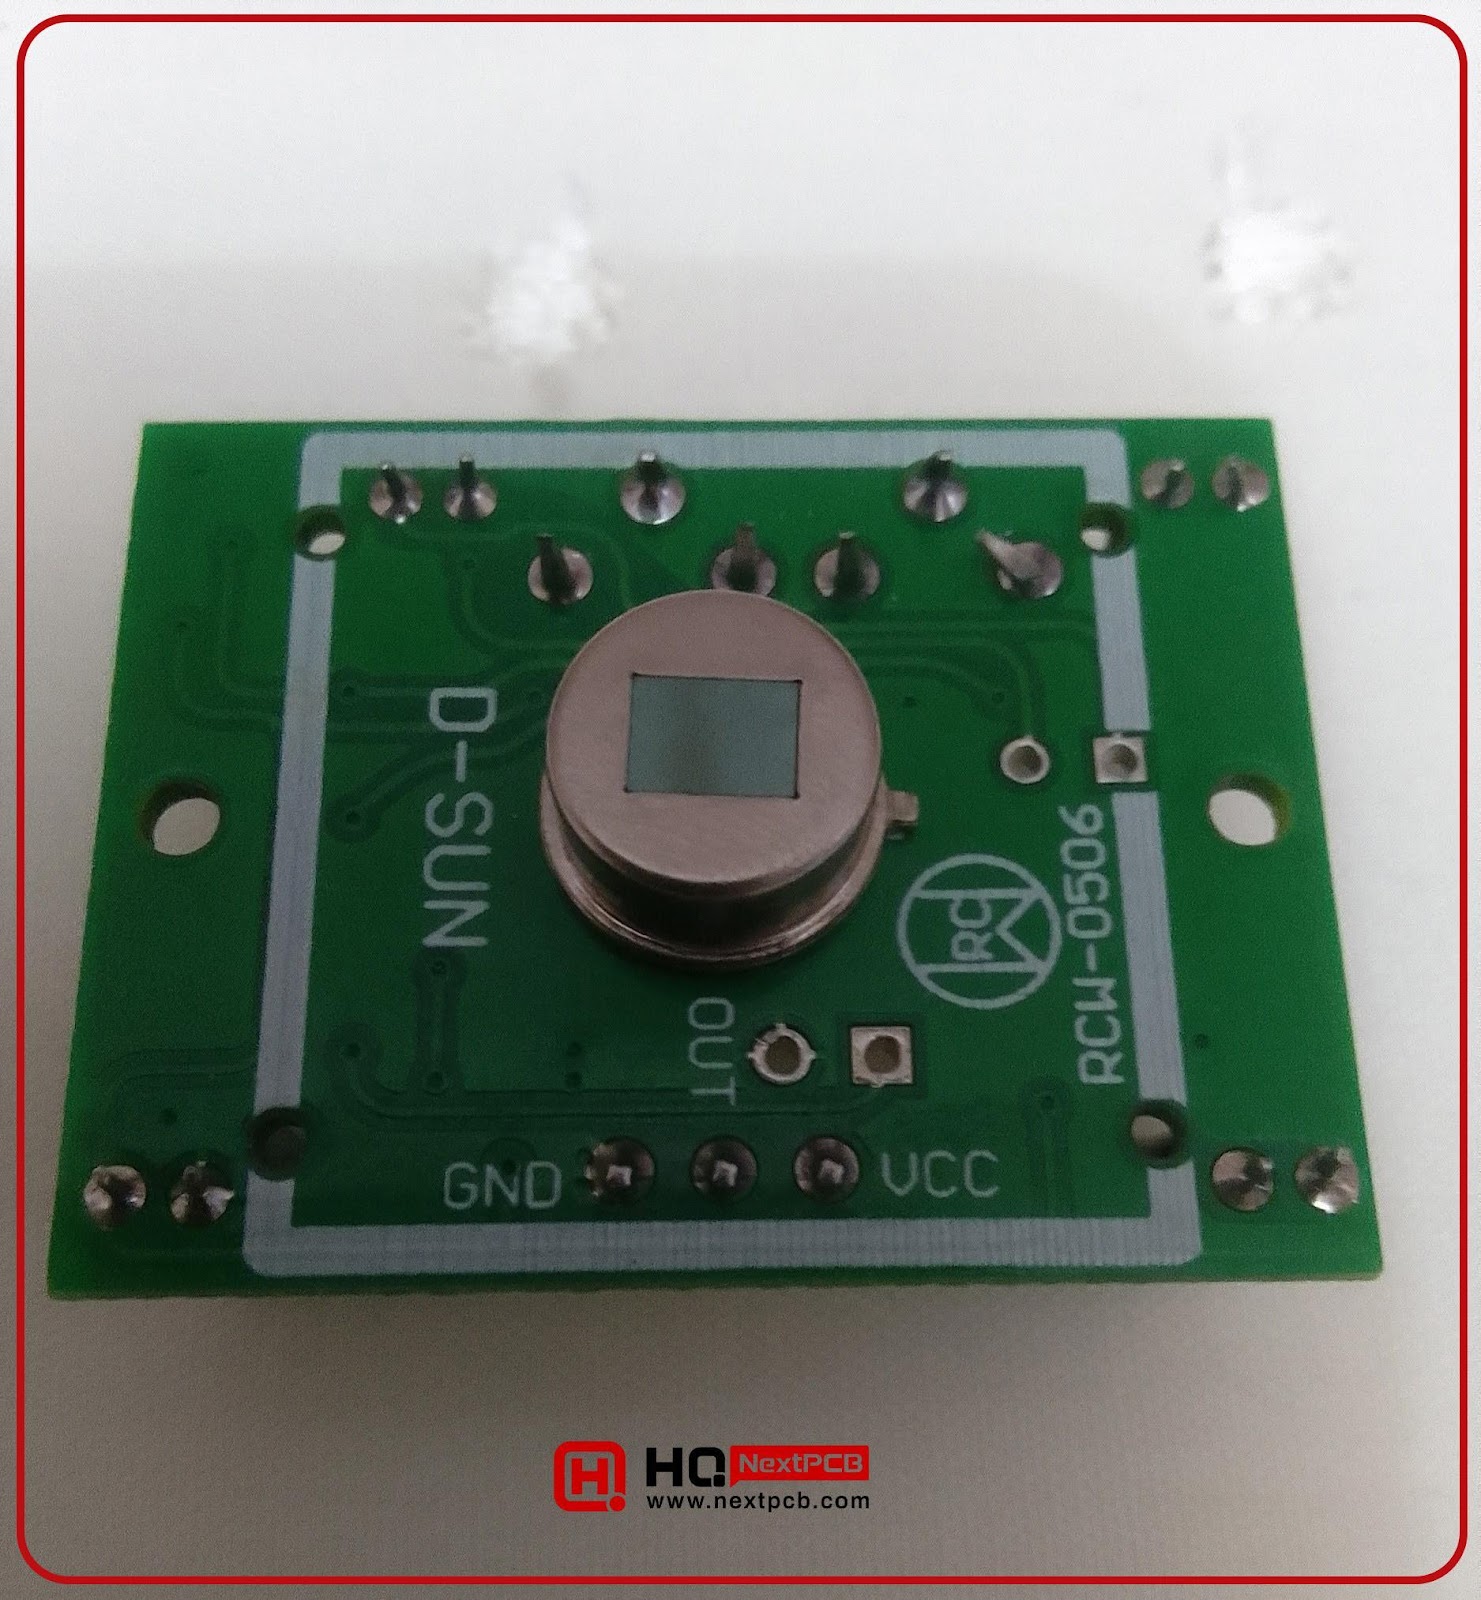
Fig: PIR motion sensor inside view
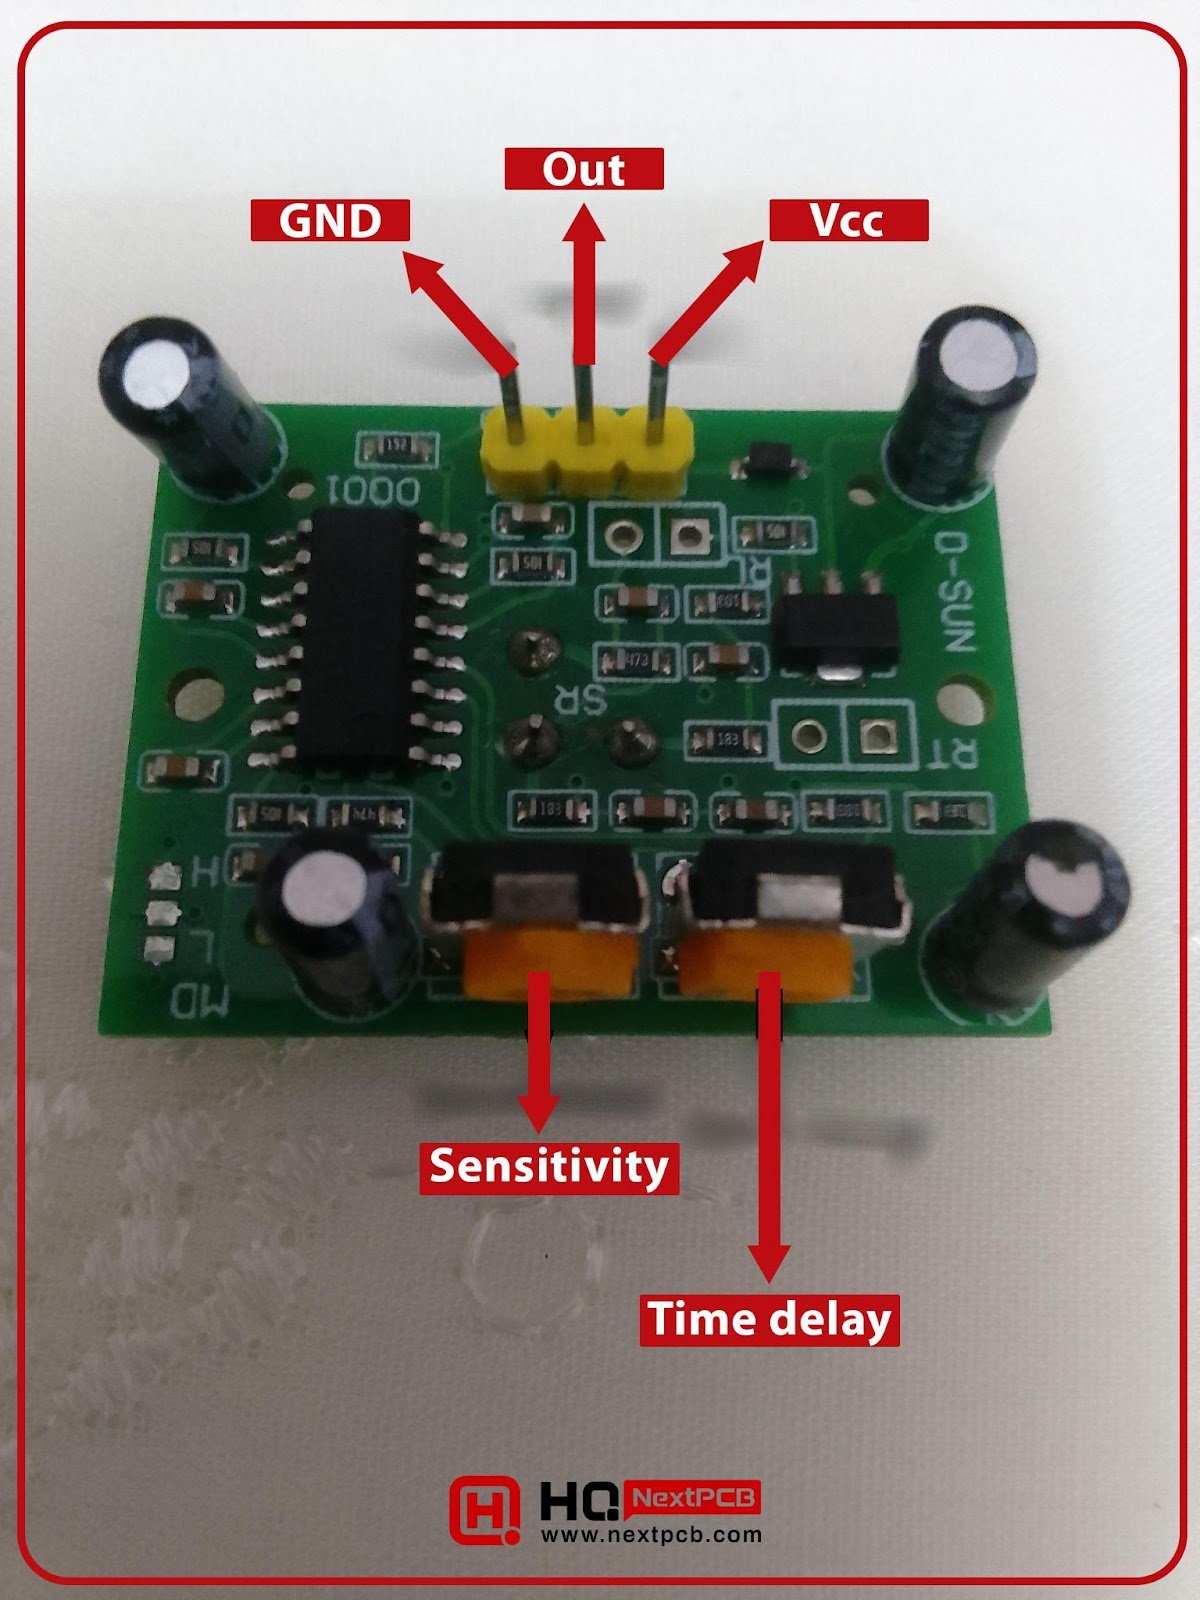
Fig: PIR motion sensor back view
It has 3 pins. Vcc, Out, and GND. If you power it up with 5V at the VCC and GND pins, you have to read the output pin to know if someone is moving in front of the sensor. The output pin becomes HIGH if the sensor detects motion. In case of no motion, it is LOW. The board has two different variable POTs. The one on the left is to adjust the sensitivity of the sensor, the right one is to adjust the time delay.
Some of these sensor modules may come with a jumper set.
- H - is for repeat trigger
- L - is for a single trigger
However, in many modules, you will not have any option to change these jumper positions. Rather, this position is fixed.
A Passive Infrared (PIR) motion sensor is widely used in various applications due to its ability to detect motion through the infrared radiation emitted by objects. Here are some uses of PIR motion sensors:
- Home Security Systems: PIR sensors are used in alarm systems to save homes from intruders. When motion is detected, the system keeps ringing an alarm and/or notifies the homeowner.
- Automatic Lighting: PIR sensors are used to turn on lights automatically when motion is detected and turn them off after a set period of inactivity. Thus automatic lighting systems enhance energy efficiency. Many eco-friendly office buildings have adapted this system to cut down on electricity bills.
- Smart Home Automation: In smart homes, PIR sensors can be integrated with other devices to trigger actions, such as turning on a heater when the temperature is low during winter, turning on an air conditioner, and maintaining a certain temperature during hot summer days.
- Public lavatories: PIR sensors are commonly used in public restrooms to control lighting and ventilation systems. The sensors ensure they operate only when the space is occupied.
- Occupancy Detection: In office buildings and commercial spaces, PIR sensors can be used to monitor occupancy and adjust heating, ventilation, and air conditioning (HVAC) systems accordingly.
- Outdoor Security Lights: PIR sensors are used in outdoor security lights to deter intruders and provide illumination only when motion is detected.
- Automatic Doors: PIR sensors can be used to automatically open doors when motion is detected, commonly seen in retail stores and office buildings.
- Energy Management Systems: PIR sensors are largely used in energy management systems. They can reduce energy consumption by controlling lighting, HVAC, and other systems based on occupancy.
- Pet Monitoring Systems: PIR sensors can be used in pet monitoring systems to track the movement of pets
and ensure their safety, such as automatically closing a door to keep pets within a certain area.
- Interactive Displays: In museums, retail stores, and exhibitions, PIR sensors can be used to activate interactive displays or multimedia presentations when a person approaches, enhancing the visitor experience.
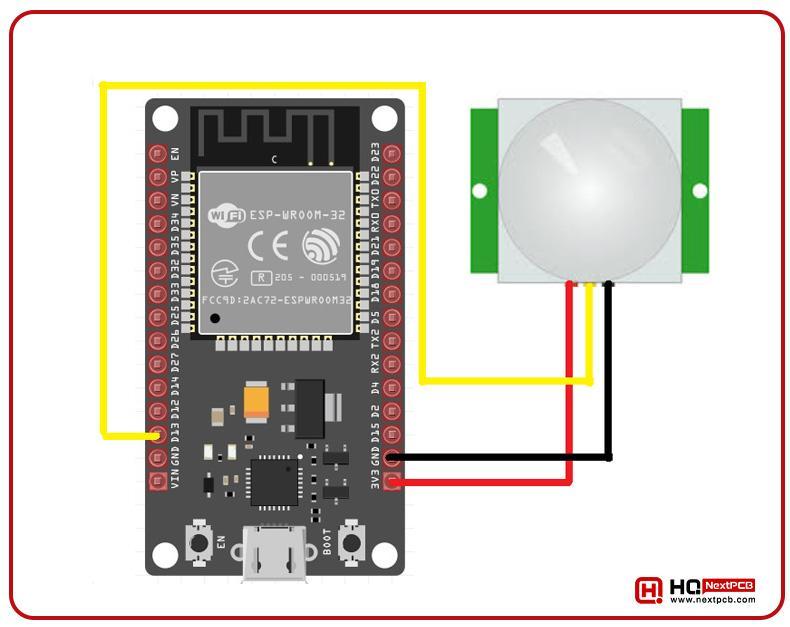
ESP32 PIR Sensor Circuit diagram
Here’s the circuit diagram for interfacing PIR Sensor with ESP32:

|
|
|
|
|
|
|
|
|
|
|
|
ESP32 Installation in Arduino IDE
If this is your first project with the ESP32, you need to install the board in your Arduino IDE first. This is how you have to install the ESP32 boards.
- Open the Arduino IDE
- Go to board preferences
- Copy this URL: https://images.theengineeringprojects.com/software/esp32.json
- Paste it in the shown direction. If you installed other boards(like ESP8266 or Raspberry Pi Pico) earlier in the same manner, you have to separate all the URLs by comma.
- Type ESP32
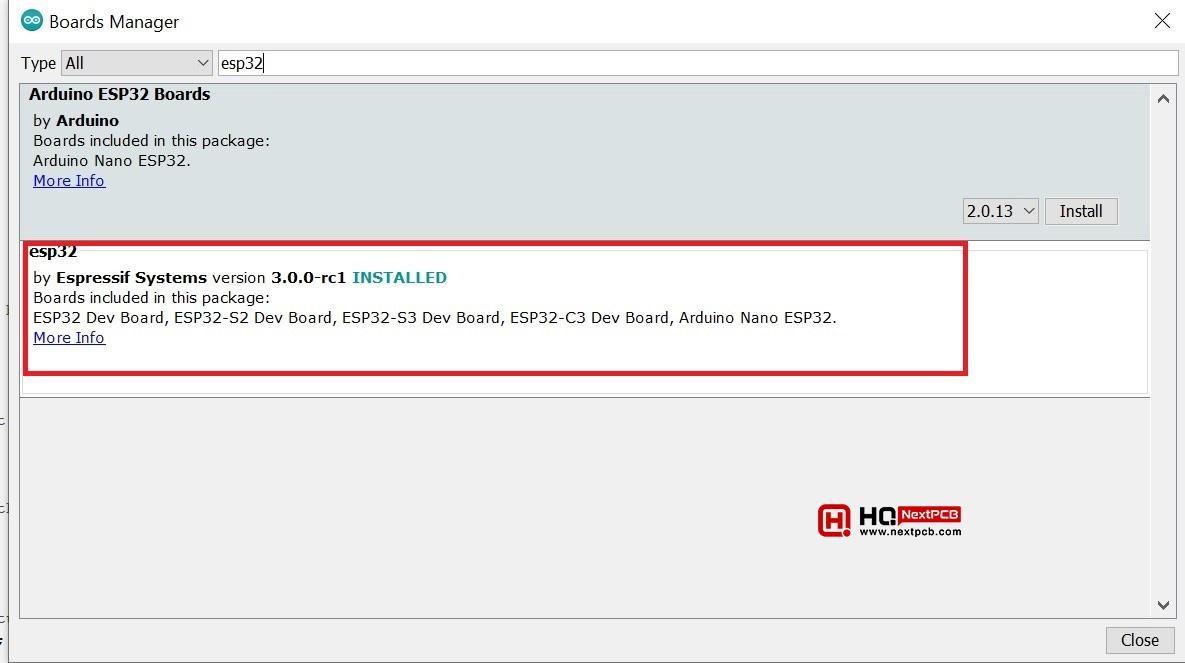
Fig:ESP32 board installation
- Select ESP32 and Click install.
- Wait as long as the installation takes place. After installation, you will see the ESP32 boards in the boards’ list.
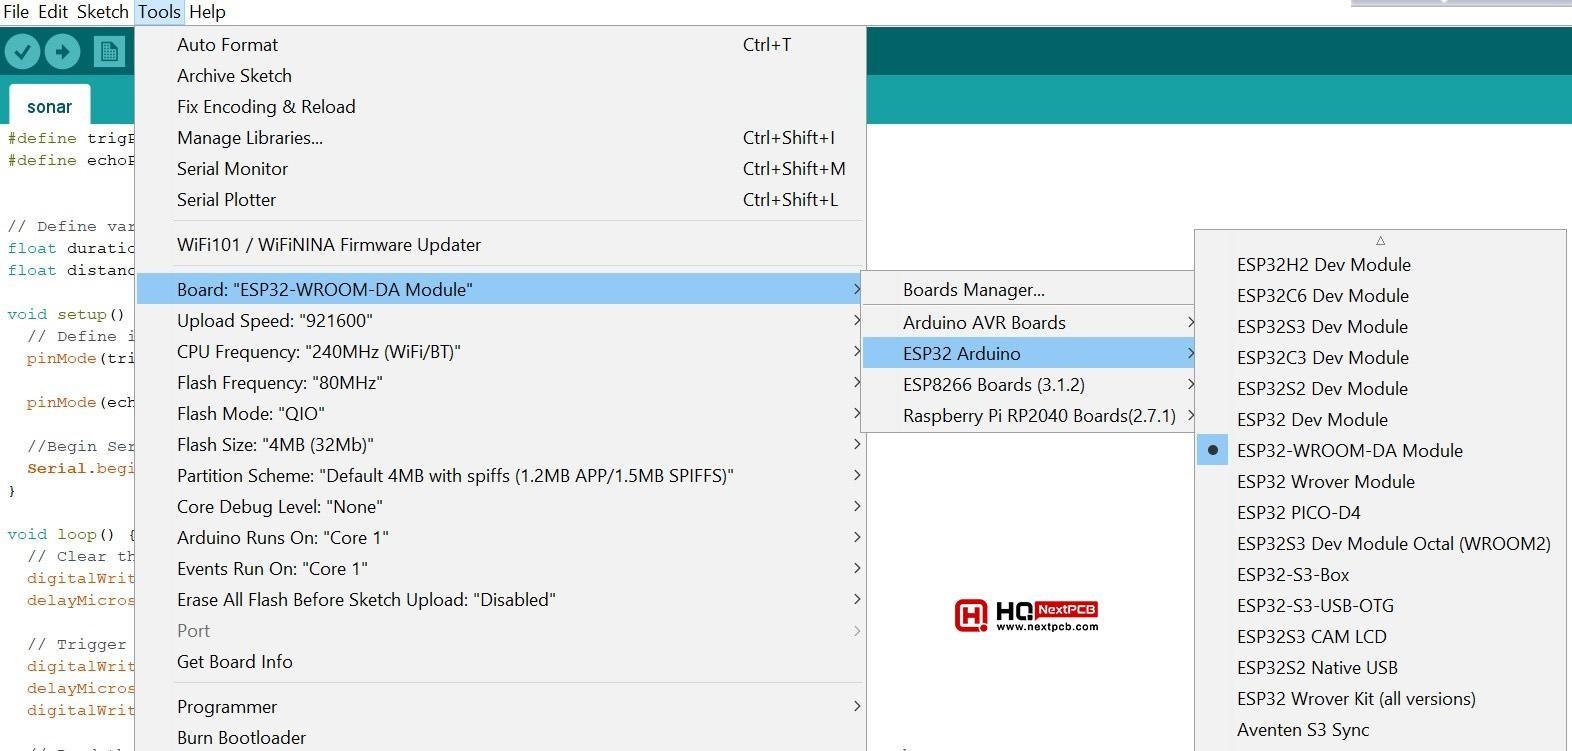
Fig: ESP32 boards list
ESP32 Driver Installation
If you do not have the CP210x driver installed on your computer, you have to download and install it from here:
Programming Code in Arduino IDE
Here’s the programming code to detect motion with PIR Sensor and ESP32 and display the results on the webserver:
#include
// Replace with your network credentials
const char* ssid = "ssid";
const char* password = "password";
WiFiServer server(80);
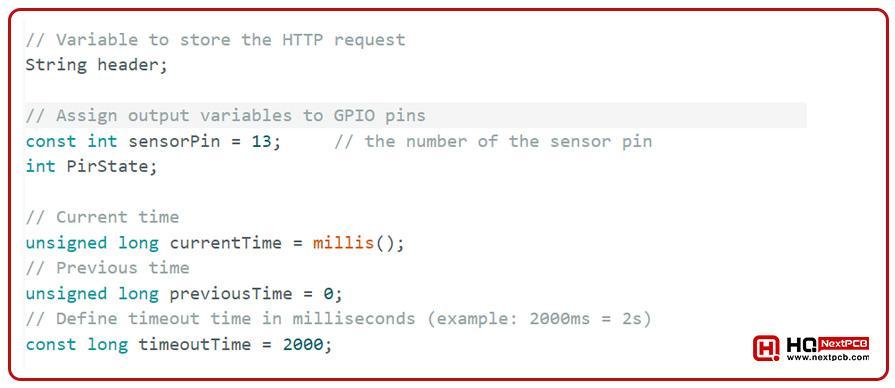
// Variable to store the HTTP request
String header;
// Assign output variables to GPIO pins
const int sensorPin = 13; // the number of the sensor pin
int PirState;
// Current time
unsigned long currentTime = millis();
// Previous time
unsigned long previousTime = 0;
const long timeoutTime = 2000;
void setup() {
Serial.begin(115200);
pinMode(sensorPin, INPUT);
// Connect to Wi-Fi network with your own SSID and password
Serial.print("Connecting to ");
Serial.println(ssid);
WiFi.begin(ssid, password);
while (WiFi.status() != WL_CONNECTED) {
delay(500);
Serial.print(".");
}
// Print the device's IP address and start web server
Serial.println("");
Serial.println("WiFi connected.");
Serial.println("IP address: ");
Serial.println(WiFi.localIP());
server.begin();
}
void loop() {
PirState = digitalRead(sensorPin);
delay(200);
Serial.println(PirState);
Serial.println(WiFi.localIP());
WiFiClient client = server.available(); // Listen for all incoming clients
if (client) { // If there is a new client connected
currentTime = millis();
previousTime = currentTime;
Serial.println("New Client."); // print a message in the serial port indicating new client
String currentLine = ""; // make an empty String that will hold incoming data from the client
while (client.connected() && currentTime - previousTime <= timeoutTime) { // loop while the client's connected
currentTime = millis();
if (client.available()) { // if there's bytes to read from the client,
char c = client.read(); // read a byte, then
Serial.write(c); // print it out the serial monitor
header += c;
if (c == '\n') { // if the byte is a newline character
// if the current line is blank, you got two newline characters in a row.
// that's the end of the client HTTP request, so send a response:
if (currentLine.length() == 0) {
// HTTP headers always start with a response code (e.g. HTTP/1.1 200 OK)
// and a content-type so the client knows what's coming, then a blank line:
client.println("HTTP/1.1 200 OK");
client.println("Content-type:text/html");
client.println("Connection: close");
client.println();
// turns the GPIOs on and off
// Display the HTML web page
client.println("
"
);
client.println("
"
);
client.println("
");
// CSS to style the on/off buttons
// Feel free to change the background-color and font-size attributes to fit your preferences
client.println("");
client.println(" ");
// Web Page Heading
client.println("
ESP32 Web Server
");
// Display current PIR sensor state
client.println("
PIR Sensor State: ");
client.println(PirState);
client.println("
");
client.println("");
// The HTTP response ends with another blank line
client.println();
// Break out of the while loop
break;
} else { // if you got a newline, then clear currentLine
currentLine = "";
}
} else if (c != '\r') { // if you got anything else but a carriage return character,
currentLine += c; // add it to the end of the currentLine
}
}
}
// Clear the header variable
header = "";
// Close the connection
client.stop();
Serial.println("Client disconnected.");
Serial.println("");
}
}
Code Explanation
Now let’s understand the code working:
Include Library
In the start, include the WiFi library necessary for the ESP32 to handle Wi-Fi connections.

Define Network Credentials

Variables “ssid” and “password” store the name and password of the Wi-Fi network for the connection.
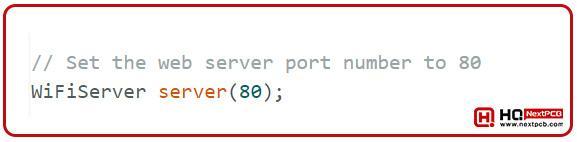
Set Up Web Server
server is an instance of WiFiServer set to listen on port 80, which is the default HTTP port.
Initialize Variables
Setup Function
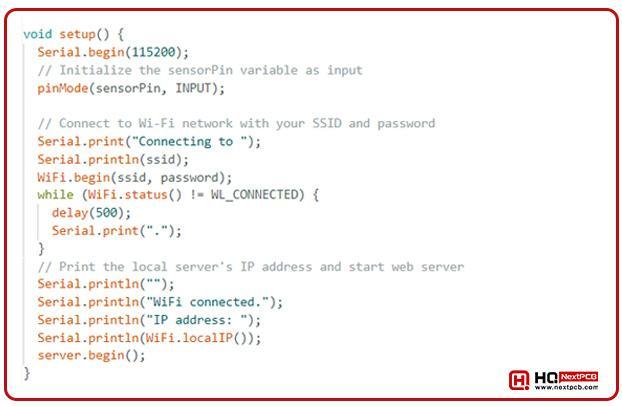
The setup function initializes communication and prints the device’s IP address.
Loop function


The code sets up an ESP32 as a web server that provides the state of a PIR sensor via a simple web page.
The server handles HTTP requests while keeping an eye out for new connections. The web page auto-refreshes every 0.5 seconds to update the PIR sensor state. The client connection is managed with a timeout to avoid indefinite waiting for data.
This breakdown explains the flow and functionality of each section of the code, making it easier to understand how the ESP32 handles Wi-Fi connections and serves web pages with sensor data.
Project Testing/Result
Make all the necessary circuit connections and upload the code to the ESP32. Do not forget to select the proper board and PORT before uploading.
If the code is properly uploaded, you will see the device’s IP address and PIR sensor data in the serial monitor.

Fig: IP address and PIR sensor output
Copy and paste the address to your web browser and press ENTER.

Fig: PIR sensor output data in web server
If all connections are established properly, you will see the PIR sensor output data in the web server.
When there is no motion, the output will be LOW.
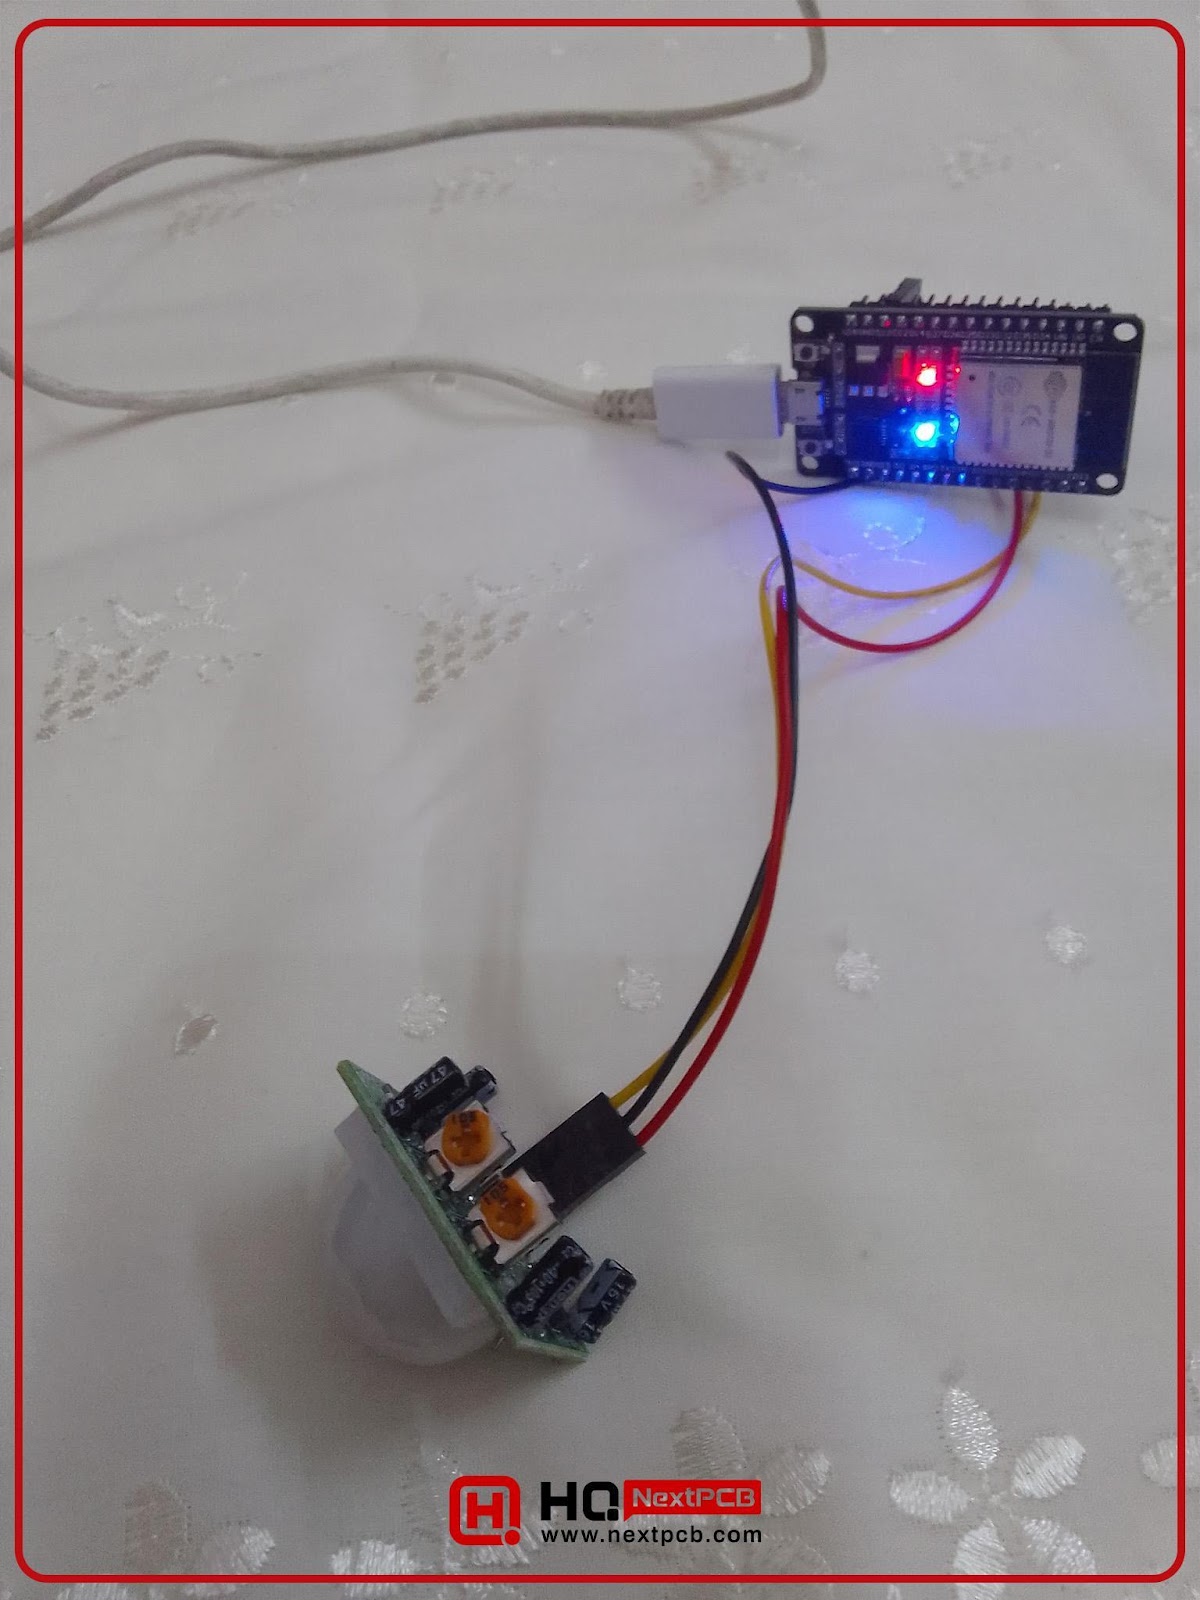
Fig: No motion
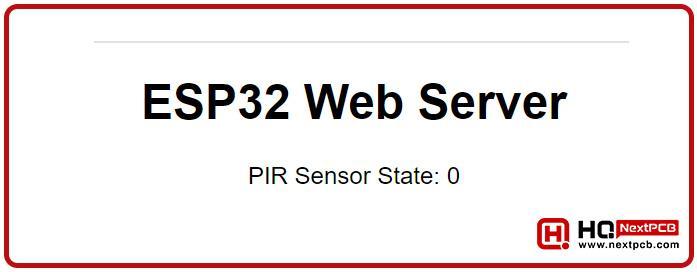
Fig: LOW output data
Now create some motion in front of the PIR motion sensor.
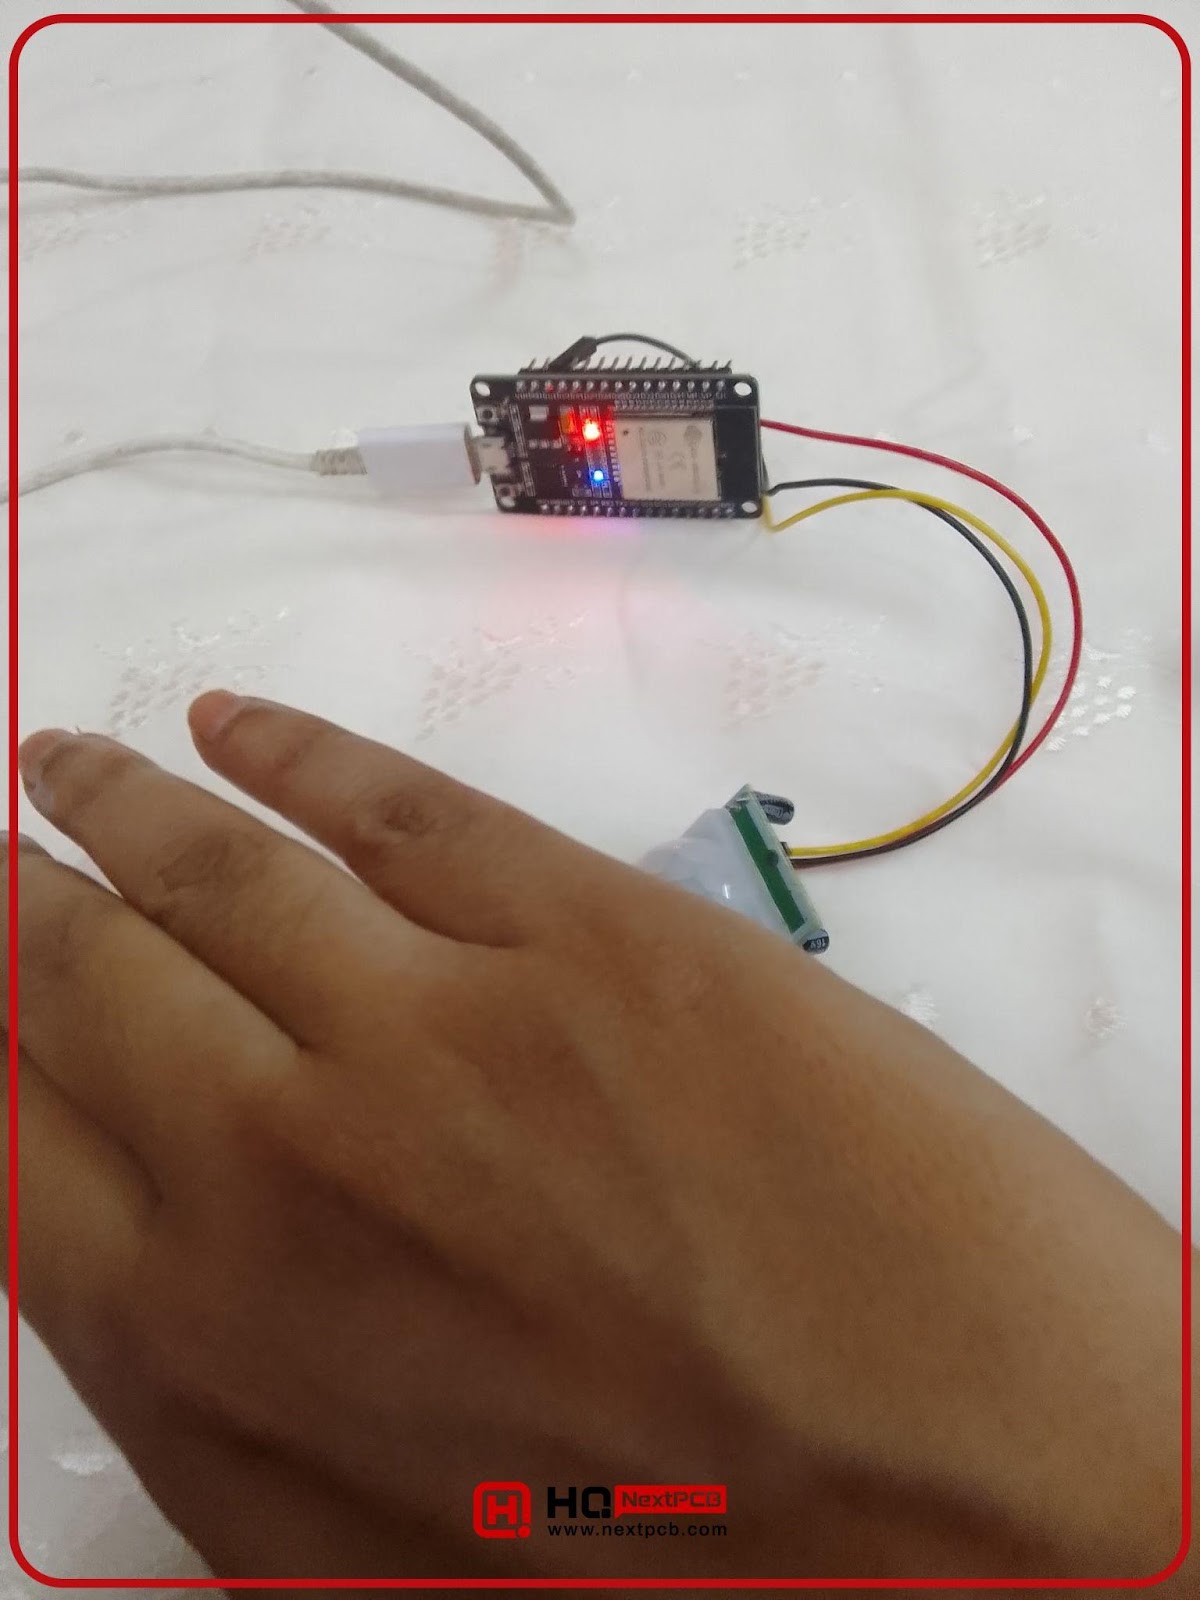
Fig: Motion Detected
You will see the output changing to HIGH.
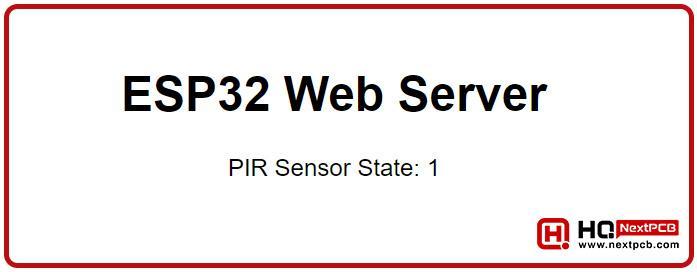
Fig: Motion detected, Output data HIGH
Project’s Limitations
In this method, you can see the sensor data in the webserver, only if your computer and the ESP32 are connected to the same network. You cannot see the data from other places. If you need to read the sensor no matter where you are, you have to use BLYNK, Tasmota, etc.
PIR motion sensors can detect movement. But it cannot tell you what is moving. The moving object in front of the sensor can be a human or an animal. This sensor cannot differentiate. If you need to detect humans, you must use an ESP32-CAM and image processing.
Comment